Well my last Share and Tell blog for 2018 certainly reminds me how special sewing can be and how passing on skills from one generation to the next or even learning together can help create some awesome memories for families. And the same can be achieved by upcycling a special garment to pass on special memories to the new generations – see the story at the bottom of the page
Read MoreI don’t know about you, but every Christmas things get rather hectic around my home and I’m trying to think of unique, personalized gifts for our family members. When my daughter was younger I used to love whipping up a selection of new outfits for her dolls because I could always use fabric I had in my stash and they were so quick and easy to make up that I could make them either when she was at school or after she had gone to bed. And the best part was, they were ‘one of a kind’ and ‘made with love’ so they meant just that little bit more to both of us.

Read MoreI am very proud of the fact that I offer a 100% money back guarantee on my How to Make Doll Clothes and my Learn to Love Your Serger (Overlocker) Courses and am pleased to say that the majority of my customers have been thrilled with the content and I haven’t had to worry about refunds.
The other day however, a lady who purchased the online course with the intention of using it to help her teach her granddaughter how to sew sent me an email requesting her money back. The following is a snippet of her email.
Read MoreWhere has the time gone? It’s been ages since I did a Share and Tell blog and there are lots of gorgeous photos I have to share with you all so let’s get straight into the first one which is from Barbara who has made my Winter Nightie pattern for a Waldorf inspired doll and she’s used unicorn print fabric which seems to be sooo popular at the moment with little girls.
Read MoreHope you’ve been enjoying using my 18 inch American Girl and 18 ½ inch Cabbage Patch Kids patterns to make doll clothes for the Bitty Baby and Bitty Twin dolls.
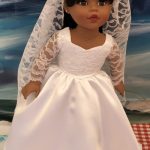
In this blog I will be showing you how to adjust my Halloween patterns and my popular Wedding Dress pattern to fit these 15 inch dolls
Read More‘Sew’ did you have fun using my patterns from Part 1 to make doll clothes for your Bitty Baby and Bitty Twin dolls? Well, I’m back with Part 2 of this blog series to show you which of my doll clothes patterns will fit the Bitty Baby and Bitty Twin dolls with only slight adjustments. I will explain exactly what each of these adjustments are.
I feel confident that you will be able to do these minor adjustments yourself as they are mostly just shortening hems or straps. Where I have suggested shortening the length of a pattern piece, for example the One Piece Swim Suit, this simply requires you to fold the pattern pieces and smoothing out the join. If you need to shorten them 1/2” (12mm) draw a line at the waist and another line 1/4” (12mm) above the first line. Fold along the bottom line and then bring the pattern piece up as you fold along the top line. The picture below shows the two lines that have been drawn on the front piece and then the back piece after it has been folded along these lines. You then simply smooth out the curve when the fold is. Shortening the overalls will work the same way.
Read MoreAhhh, so many good things happen in September. It’s the beginning of Spring here in Australia and that’s my favourite season, it’s my birthday, my wedding anniversary and of course in America it’s National Sewing Month!
‘Sew’ let’s celebrate ‘Sewtember’ with 20% off ALL Doll Clothes Patterns, for the whole month of September. Yep, that means 20% off ALL 18 inch and American Girl doll clothes patterns and ALL 18 ½ inch Cabbage Patch doll clothes patterns.
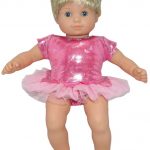
Read MoreHave you been waiting for me to come out with some doll clothes patterns suitable for the 15 inch Bitty Baby and Bitty Twin dolls? Well I’ve got some AWESOME news! There’s no need to wait any longer as many of the 18 inch American Girl and 18 ½ inch Cabbage Patch doll clothes patterns I already have available fit these dolls really well without any adjustments and some only require minor alterations.
I’ve wanted a 15 inch Bitty Baby or Bitty Twin doll for a couple of years now because some customers have told me that certain patterns of mine fit the Bitty Baby with only minor tweaks necessary. But because I didn’t have my own doll, I was not able to confirm this.
Well, I’m super excited to say that I finally have my very own Bitty Twin doll. I couldn’t find his twin sister, but he seems to be fitting in with all the other dolls nicely. I’m named him Terri because I think he also makes a very cute girl doll and seeing as I will be dressing him mostly in girl doll clothes, that seemed appropriate.
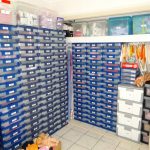
Read MoreWhen I first started Rosie’s Dolls Clothes, my online website where I sell doll clothes, I had piles of clothes on a shelf in my cupboard and they were sorted in piles for each doll size. I was feeling rather proud of my ‘organised’ system until my darling hubby, Brad, walked in and said, ‘You’ll never survive if you store your doll clothes like that. When you have lots of stock and the orders come in you are going to get so confused.’ Wham! That brought me back to reality and I will admit, it hurt a little but then he explained that being a Logistics and Supply Chain Manager and working in warehouses and distribution centres, he knew a thing or two about organising stock. Thankfully, I put my pride to the side and listened to the expert as I wanted this business to grow and succeed. Because I know many of you sell your doll clothes online I thought I would share this valuable tip with you and hopefully it will make your life a little less stressful.
The first thing Brad got me to do was go out and purchase some storage bins. I needed something that would fit into my cupboard and allow easy access to the doll clothes. I quickly ruled out the plastic bins that stacked on top of each other because to get to the clothes stored in the bottom bin I would have to pull that bin out of the pile and remove the lid, then put it all back in place. The ideal solution would be drawers and thankfully plastic storage drawers were popping up everywhere but what size would I need? I started with a couple of different sizes as I didn’t know at the time which would work best.
Now that I had my storage sorted it was time to get organised and this was when Brad introduced me to ‘Bin Locations’. In a nutshell, this is just giving each drawer (or bin) a number so I bought some sticky labels to put on each bin and simply started with ‘1,2,3,4….’, you get the idea.
I’m not sure if you realise just how excited I get when I receive an email with a photo attached. I’m kind of like a big kid, I can’t wait to open it and see what the photo is and who it’s from. I know it’s selfish, but I do get a rush from knowing that I’ve helped someone create something truly special and unique from a flat piece of fabric and then I get to share the photos with you all!
These first photos are from Megan who has made this super cute Handkerchief Top and matched it with some beautiful matching long shorts. She simply adapted my Sports Shorts pattern by adding length and adding the trim around the hem. Then she was inspired to make a ‘Frozen’ dress for her granddaughter by adapting my Wedding Dress pattern and what an absolutely amazing job she has done!
‘Hi Rosie
………I had a lot fun being inspired by and adapting your patterns. My husband joined in and made the clothes hangers.
With thanks Megan’