• Home
  • About
  • Contact
  • Login
  • Cart
Rosies Doll Clothes Patterns
  • All Rosie’s Doll Clothes Patterns
    • American Girl Doll Clothes Patterns
    • Cabbage Patch Doll Clothes Patterns
    • Doll Sizing
    • Testimonials
  • How to Make Doll Clothes Course
    • How to Make Doll Clothes Online Sewing Course
    • Who Will Benefit
  • Learn to Love Your Serger Course
  • Tips & Freebies
    • Free Sewing Patterns
    • Rosie’s Big List of Sewing Tips
    • Rosie’s Sew and Share Facebook Group
  • Our Blog
  • Customer Service
    • Contact Us
    • Frequently Asked Questions
    • Payment for Order
    • Delivery of Products
    • Refund Policy
Menu
  • All Rosie’s Doll Clothes Patterns
    • American Girl Doll Clothes Patterns
    • Cabbage Patch Doll Clothes Patterns
    • Doll Sizing
    • Testimonials
  • How to Make Doll Clothes Course
    • How to Make Doll Clothes Online Sewing Course
    • Who Will Benefit
  • Learn to Love Your Serger Course
  • Tips & Freebies
    • Free Sewing Patterns
    • Rosie’s Big List of Sewing Tips
    • Rosie’s Sew and Share Facebook Group
  • Our Blog
  • Customer Service
    • Contact Us
    • Frequently Asked Questions
    • Payment for Order
    • Delivery of Products
    • Refund Policy
  • About Rosie
  • Affiliate Program
    • Affiliate Resources
  • Buy 18 Inch Doll Clothes Patterns
    • American Girl Doll Clothes Patterns
      • American Girl Doll Accessory Patterns
        • American Girl 3 Way Shoe
        • American Girl Underpants
        • Multi Size Doll Diaper and Nappy Pattern
        • American Girl Fairy Wings
        • American Girl Doll Hat Pattern
      • American Girl Doll Beach Patterns
        • American Girl Doll Bikini and Tankini
        • American Girl One Piece Swim Suit
        • American Girl Sarong
        • American Girl Beach Bag
      • American Girl Doll Bedtime Patterns
        • American Girl Summer Nightie
        • American Girl Winter Nightgown
        • American Girl Winter Pajamas
        • American Girl Summer Dressing Gown
      • American Girl Doll Bottoms Patterns
        • American Girl 3 Way Skirt
        • American Girl Capri Pants
        • American Girl Overalls For All Seasons
        • American Girl Peasant Skirt
        • Cabbage Patch Kids Peasant Skirt
        • American Girl Tights
        • American Girl Sports Shorts
      • American Girl Doll Dress Patterns
        • American Girl Drop Waist Dress 5 Ways
        • American Girl Pinafore Dress and Skirt
        • American Girl Strappy Dress
        • American Girl 50s Vintage Dress
        • American Girl Summer Dress
      • American Girl Doll Glitz and Glamour Patterns
        • American Girl Ballerina
        • American Girl Doll Wedding Dress Pattern
      • American Girl Doll Tops Patterns
        • American Girl Blouse
        • American Girl Doll Trendy Transformable Top
        • American Girl Fun and Frilly Top
        • American Girl T-Shirt
        • American Girl Halter Top
        • American Girl Handkerchief Top
        • American Girl Crop Top
      • American Girl Doll Winter Patterns
        • American Girl Funky Fur
        • American Girl Fur Trimmed Jacket
      • American Girl Halloween Outfits Patterns
        • American Girl Witches Costume
        • American Girl Pumpkin and Tights
        • American Girl Fairy Costume
        • American Girl Angel Costume
    • Cabbage Patch Doll Clothes Patterns
      • Cabbage Patch Doll Accessory Patterns
        • Cabbage Patch 3 Way Shoe
        • Cabbage Patch Underpants
        • Multi Size Doll Diaper and Nappy Patterns
        • Cabbage Patch Fairy Wings
        • Cabbage Patch Hat Pattern
      • Cabbage Patch Doll Beach Patterns
        • Cabbage Patch Bikini and Tankini
        • Cabbage Patch One Piece Swim Suit
        • Cabbage Patch Sarong
        • Cabbage Patch Beach Bag
      • Cabbage Patch Doll Bedtime Patterns
        • Cabbage Patch Summer Nightie
        • Cabbage Patch Winter Nightgown
        • Cabbage Patch Winter Pyjamas
        • Cabbage Patch Summer Dressing Gown
      • Cabbage Patch Doll Bottoms Patterns
        • Cabbage Patch 3 Way Skirt
        • Cabbage Patch Capri Pants
        • Cabbage Patch Overalls For All Seasons
        • Cabbage Patch Tights
        • Cabbage Patch Sports Shorts
      • Cabbage Patch Doll Dresses Patterns
        • Cabbage Patch Kids Drop Waist Dress 5 Ways
        • Cabbage Patch Pinafore Dress and Skirt
        • Cabbage Patch Strappy Dress
        • Cabbage Patch 50s Vintage Dress
        • Cabbage Patch Summer Dress
      • Cabbage Patch Doll Glitz and Glamour Patterns
        • Cabbage Patch Ballerina
        • Cabbage Patch Wedding Dress
      • Cabbage Patch Doll Halloween Patterns
        • Cabbage Patch Angel Costume
        • Cabbage Patch Witches Costume
        • Cabbage Patch Pumpkin and Tights
        • Cabbage Patch Fairy Costume
      • Cabbage Patch Doll Shirt & Tops Patterns
        • Cabbage Patch Blouse
        • Cabbage Patch Fun and Frilly Top
        • Cabbage Patch Kids Trendy Transformable Top
        • Cabbage Patch T-Shirt
        • Cabbage Patch Halter Top
        • Cabbage Patch Handkerchief Top
        • Cabbage Patch Crop Top
      • Cabbage Patch Doll Winter Patterns
        • Cabbage Patch Funky Fur
        • Cabbage Patch Fur Trimmed Jacket
    • Mix and Match 5 or More Products and Save 20%
  • Customer Service
    • Contact Us
    • Currency Converter
    • Delivery of Products
    • Frequently Asked Questions
      • How to Access Your How to Make Doll Clothes Course and Bonus Patterns
      • How to Access Your Patterns and Step By Step Videos
      • How to Log In and Change Your Password
    • Payment for Order
    • Refund Policy
  • Doll Sizing
  • How to Make Doll Clothes Online Sewing Course
    • How To Make Doll Clothes Secret One
    • How To Make Doll Clothes Secret Two and Three
    • How To Sew Doll Clothes For Beginners: Sewing Kit
    • Preview Course Video Week Four – Sewing Curved (Convex) Seams
    • Preview Course Video Week One – Lets Get Started
    • Preview Course Video Week Six – Cutting Button Holes
    • Who Will Benefit
  • How to Use a Serger Online Course
  • Links
  • Log Out
  • Login
  • Lost Password
  • Patterns Catalog
  • Privacy Policy
  • Profile
  • r0IPN12
  • Register
  • Reset Password
  • Rosie’s Big List of Sewing Tips
    • Free Sewing Patterns
  • Rosie’s Blog
  • Team Management
  • Tell a Friend
  • Terms and Conditions
  • Testimonials
  • Thank You
  • Welcome
  • Welcome! What are you going to sew today?
  • What you get with Rosie’s Doll Clothes Patterns

Log in to view your videos
and print your patterns

login

Author Archives: Rosie Admin

Rosie's Blog |

July 7, 2022

| by Rosie Admin

July 2022 Sew-Along

Win a free Rosie's pattern

After the end of the month, a spinning wheel will be used to randomly select a Sew-Along entrant to receive a free pattern of their choice from the Rosie’s Doll Clothes Patterns website. The pattern will be added to the online profile of the selectee as a thank you for joining in the Sew-Along.

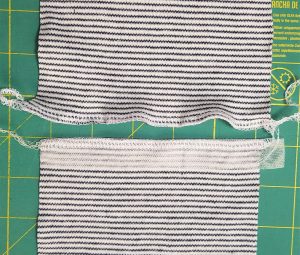
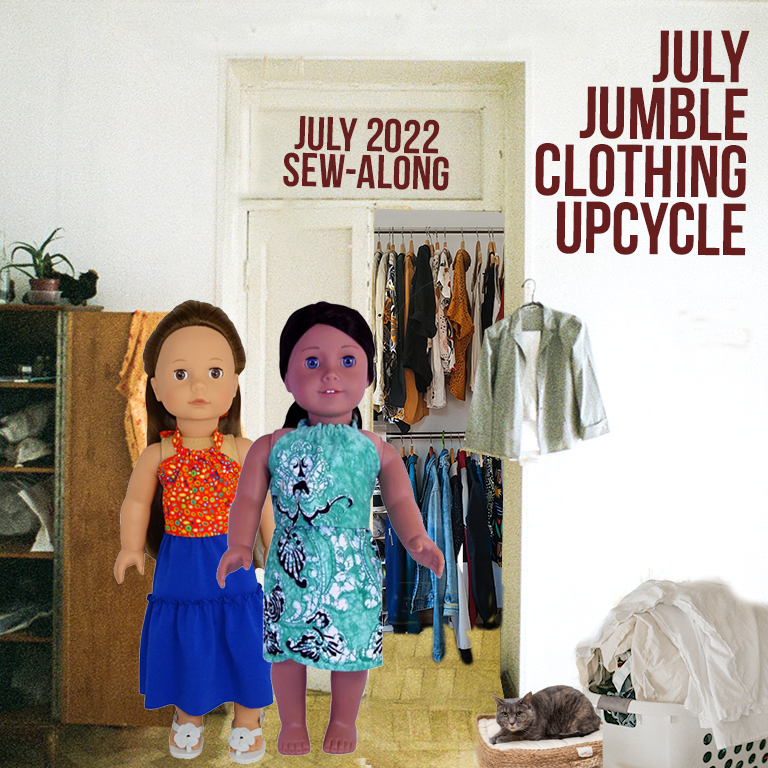
We’d love you to join in our monthly Sew-Along. This time our theme is “July Jumble Clothing Upcycle”. July is a popular month to visit yard sales, flea markets, jumble sales, op shops, and even clean out the closet.

Your fun challenge is to incorporate upcycling into your entries somehow. Have fun with it! Anyone who makes anything from an upcycled garment or other upcycled item will get **TWO** entries, as long as you tell us what you upcycled and how.


Join our Facebook Group

To participate in the Sew-Along, you must be a member of the Rosie’s Doll Clothes Patterns Sew and Share group. Joining is easy. Just point your browser here, answer the membership questions, and request to join. It’s a wonderful community of creative grown-ups who love to sew for dolls. Everyone will welcome you with open arms.


To be inclusive, absolutely anything and everything that you make with one of Rosie’s Doll Clothes Patterns can be entered in the Sew-Along for one chance to be chosen by the Spinning Wheel. Yes, that even includes the free Beanie or free Sewing Machine Pin Cushion! Remember that there’s a video for every Rosie’s pattern, so watch, learn, sew along, and have fun sewing and sharing.

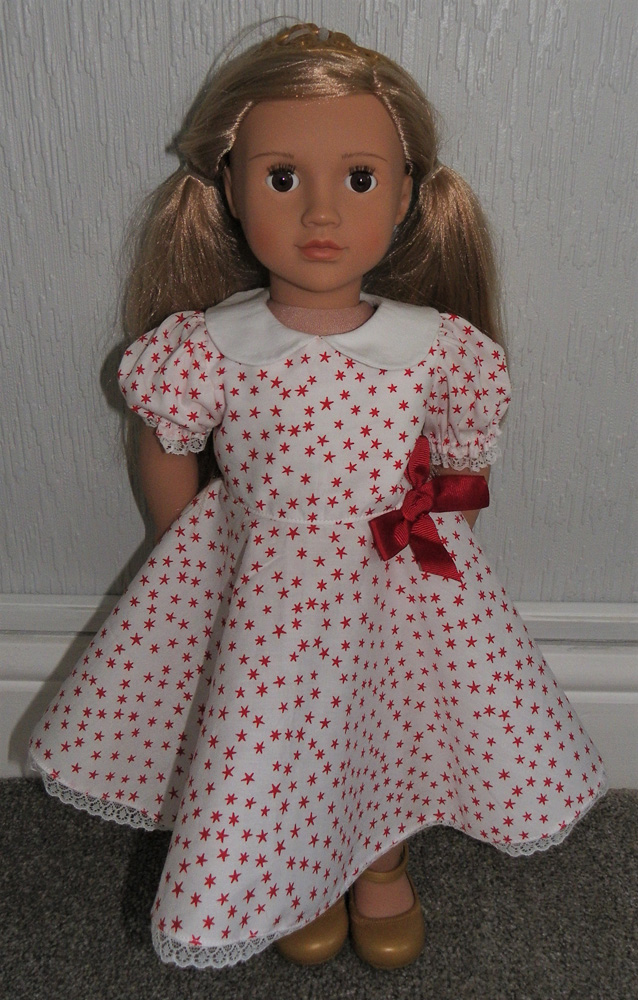
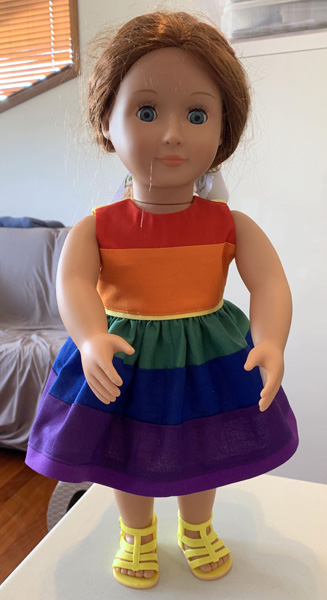
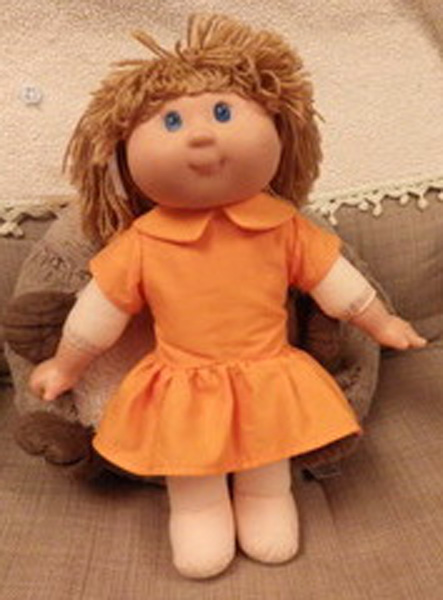
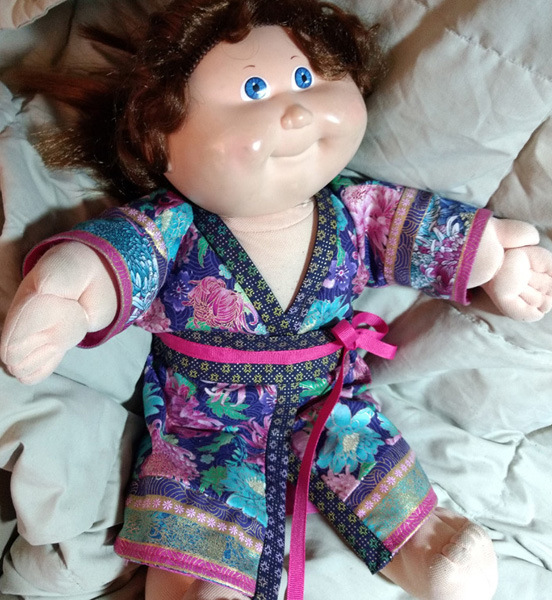
You can use the 18 inch American Girl Doll or Cabbage Patch Kid size patterns, or you can resize those patterns to fit any doll. If you wish to alter the pattern to add your own personal twist or add a special embellishment, please feel free. These personal touches create great inspiration for others!

There’s no obligation to sew every month. You can sew one outfit or a dozen. It’s totally up to you. Each item from a Rosie’s pattern that you sew and post in the album (see instructions below) will be worth at least one entry towards the wheel spin at the end of the month.

All skill levels are welcome to join in the fun as there will be no judgement, only encouragement.

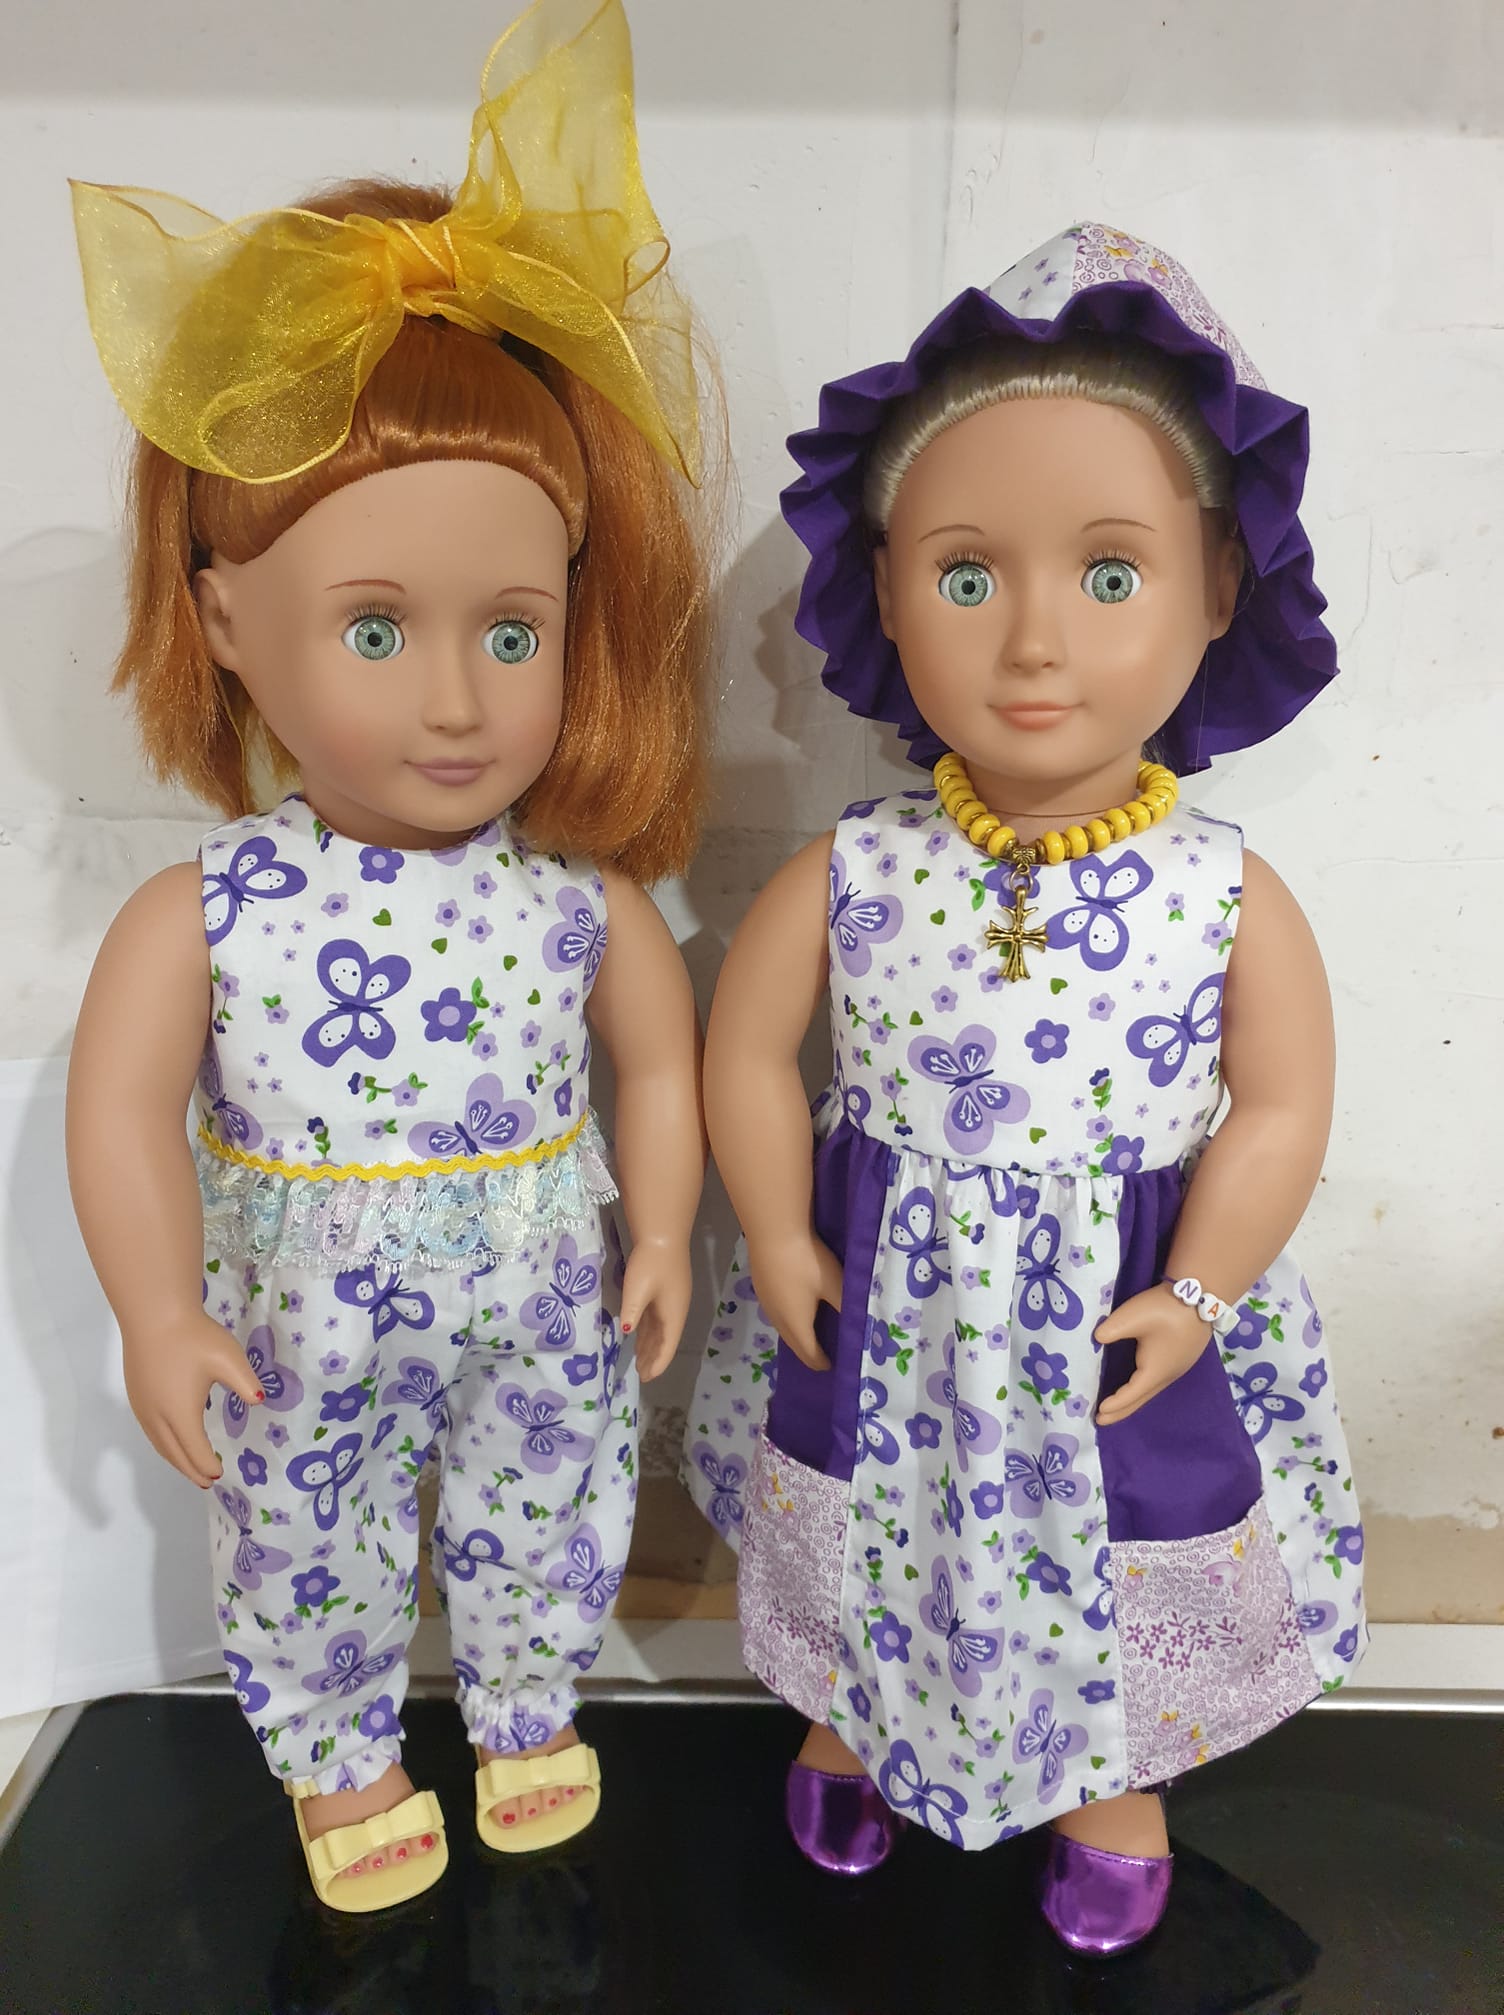
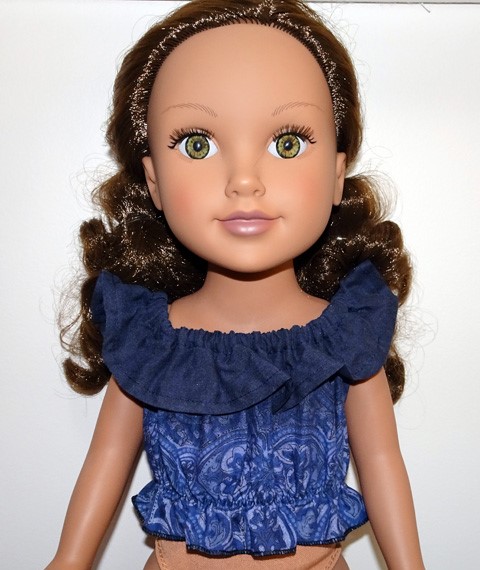
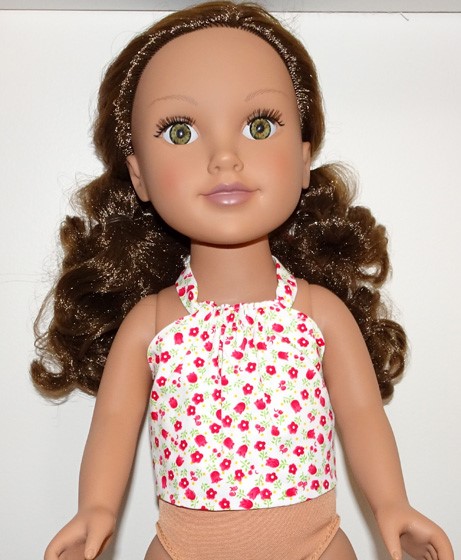
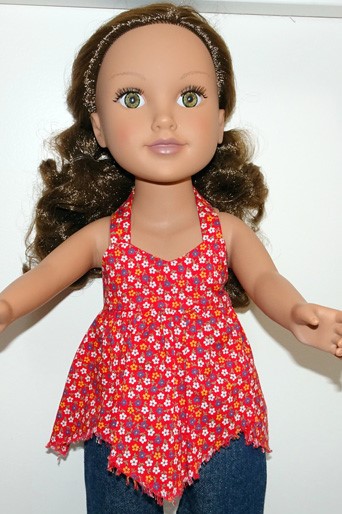
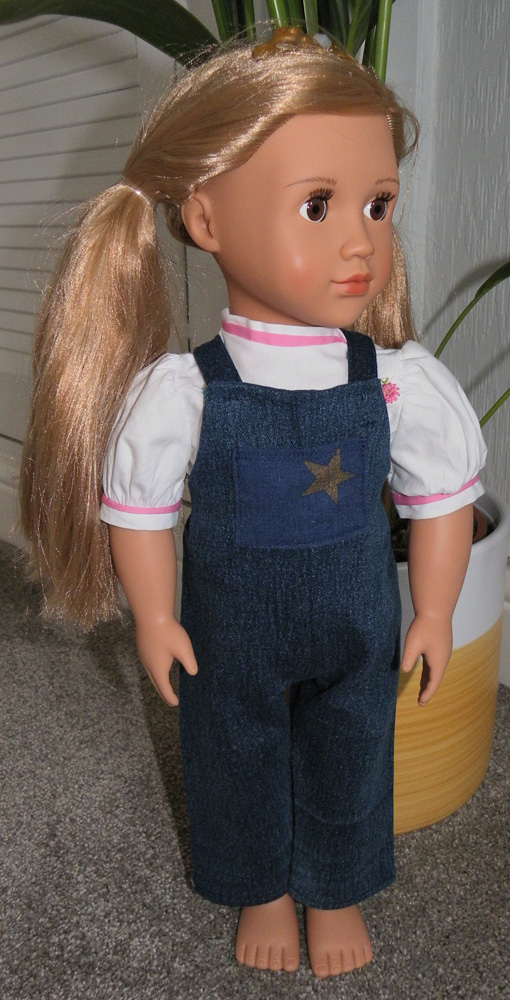
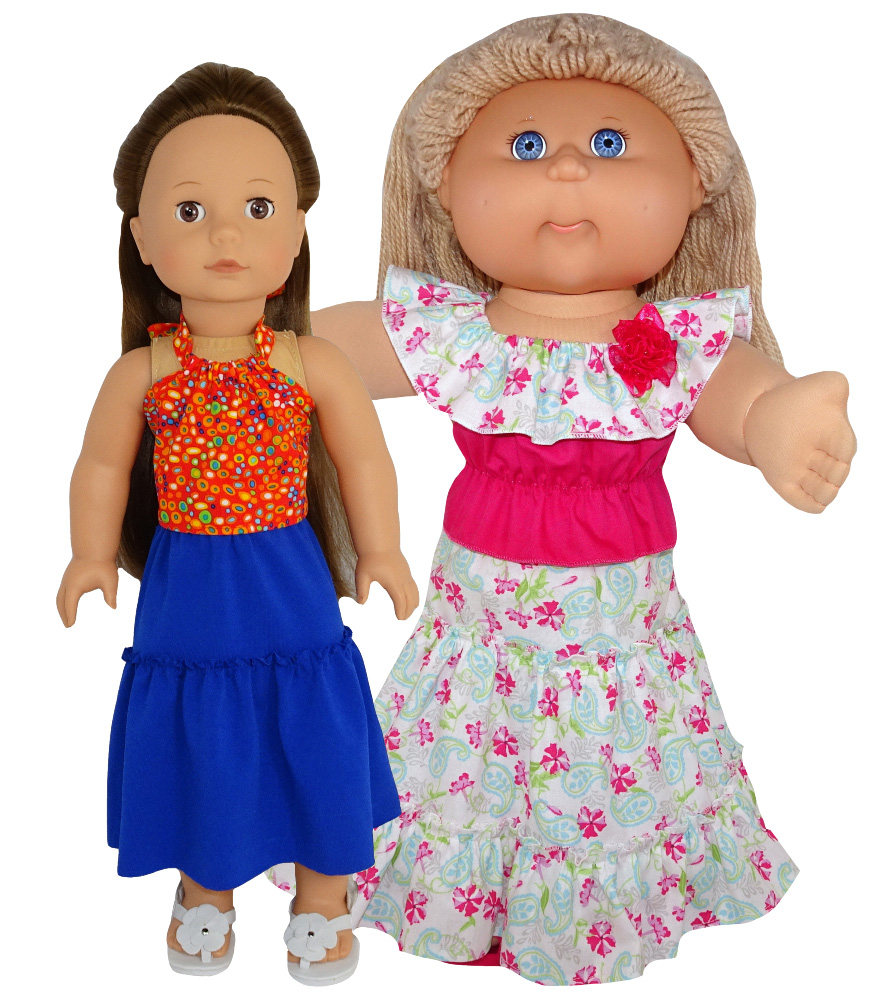
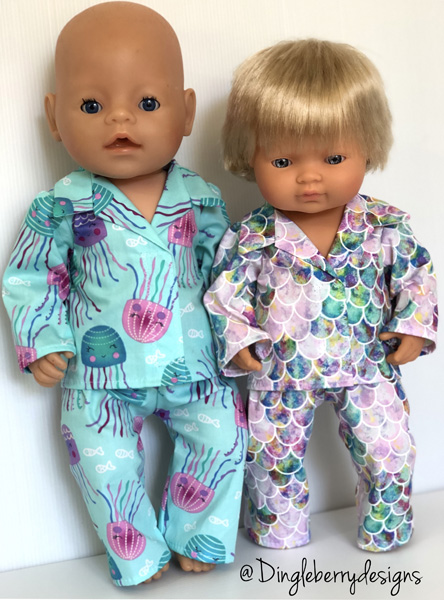
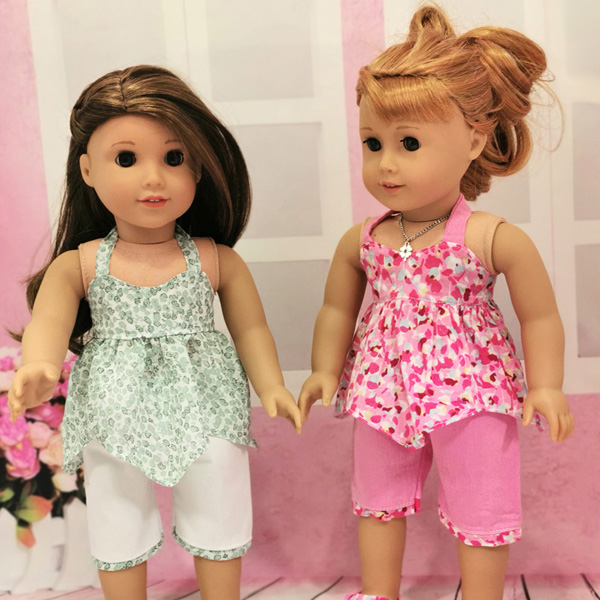
The winner of the June ’22 Sew-Along Wheel Spin is Sherrie Trudgett, who created these two outfits. April models Rosie’s Crop Top with lace trim and the Sport Shorts lengthened to long pants with elastic frill. Naya shows you Rosie’s Crop Top joined with a gathered skirt adding 2 cute little pockets and the matching Rosie’s Frill hat.

How to submit your creation

It's easy: just follow these simple steps

When you craft and photograph your item, please add it to the Rosie’s Doll Clothes Patterns Sew and Share Photo Album “July Jumble Clothing Upcycle, July 2022”. If you are not sure how to do this, please see the instructions below.

  1. Click on ‘See All’ which can be found under the ‘Recent Media’ box on the right-hand side of the page.
  2. Once you’re in Media, you’ll see 3 tabs: Photos, Video, and Albums. Click the Albums tab.
  3. Click on the Album for the Sew-Along we are doing for this month.
  4. In the top right corner, you will see ‘Add Photos/Video’ – click on this and you will be able to upload your photo.
  5. Once you have uploaded your photo, please click on it to add a few words. If you want, you can even write a description explaining what you enjoyed most about this pattern, what you found challenging, what alterations you made, what inspired your choice of fabric, embellishment, etc. or anything pertinent to the Sew-Along that you feel you would like to share about this outfit/pattern.

Browser notes: Please log in via Safari or Google Chrome instead of using the Facebook App, and this will give you the view you’d have via your desktop computer. Microsoft Edge is somewhat uncooperative, so we recommend using Chrome.

Pictures submitted in the feed or in the album may be included in blog posts on or mailings from the Rosie’s Doll Clothes Patterns Web site. If for any reason you don’t want your picture to be included, please let us know.

Rosie's Blog |

May 10, 2021

| by Rosie Admin

Journey Girl Patterns: How to Alter My Patterns to Fit

Some time ago I did a blog post showing which of my 18 inch doll clothes patterns fit the Journey Girl doll without adjustment.  If you missed that post be sure to check out ‘Journey Girl: Which of my 18 Inch Patterns Fit?‘.

Today, I’m going to share with you what minor adjustments you can make to some of my other 18 inch patterns so that Journey Girl can wear them too.

The following is a list of my 18 inch and American Girl doll clothes patterns that fit the Journey Girl nicely and I explain what adjustments to make.

Journey Girl Fun n Frilly Top

  • Pinafore, Dress & Skirt – Shorten waistband 1/2″ (1.2cm)
  • Overalls – Shorten elastic at back 1″ (2.5cm) and add ¼” to hem of pants
  • Crop Top – reduce to 95% and making the neck slightly larger because when you reduce the pattern you will also reduce the neckline and we need the neckline to be at least the original size.
  • Fun n Frilly top – take ½” from the elastic on shoulders and waist.
  • Halter top – cut 1/2″ (1.2cm) from the end which will shorten it a total of 1″ (2.5cm)
  • T-shirt – reduce to 95%.
  • Handkerchief top – cut 3/8″ from each end of the bodice.
  • Blouse – reduce it to 95% but leave the neck trim the same length and take a small amount from the neck so it is not too tight when you reduce the pattern.
  • Ballerina – reduce to 95%. Long sleeve take 1/2″ from the width of the sleeve so ¼” from each side. The photo I have showing the green leotard is the Australian Girl size and she has longer arms so make sure to cut on the American Girl cutting line for the sleeves.
  • Fairy – Take 1/2″ (1.2cm) from centre front by folding over the edge that goes on the fold 1/4″. Also cut 1/4″ from the other end to shorten the bodice a total of 1″ (2.5cm)

Journey Girl Halter Top

Journey Girl Handkerchief Top

Journey Girl Overalls

If you give this a try, I’d love you to let me know how you go and send me photos of your Journey Girl dolls wearing their lovely new clothes so I can share them on my next Share and Tell blog.

Happy sewing

Rosie

Rosie's Blog |

April 9, 2021

| by Rosie Admin

How to Make Mary Janes Using My 3 Way Shoe Pattern

I’ve said this before and I’ll say it again I’m sure, I love the creativity of the members of my Facebook Sew and Share group and I really appreciate how willing everyone is to share their ideas.

Tina has been a member of this group for a number of years now and comes up with the most amazing creations.  When she posted a photo of these Mary Jane shoes she made using my 3 Way Shoe Pattern I thought they were so cute I asked Tina if she would share how she made them with the group.  It wasn’t long before Tina uploaded these great instructions to the group.  I’ve since realized that not many people go to this file section so with Tina’s permission, I’m now sharing them in this blog post in the hope that more people can see how easy it is and maybe give it a try.

So here goes…..

3 way shoe pattern altered to make Mary Jane Shoes flipped

Use pattern pieces #1, 2 and 3 of the 3 Way Shoe pattern. I used felt for the sole (piece 3) and upcycled netball bloomers for the original shoes. For the following photos I used a heavier t-shirt/knit type material as it was all I had. Not ideal as it was a little too stretchy.  You could also use a medium weight woven fabric such as cotton. I used tracing Vilene to trace out pattern pieces onto so that I could adjust them around the foot.

1. Cut piece #1 to the cutting line for the shoe.  With a ruler, draw a straight line so that it intersects with the top of the arch in the pattern piece as in the photo. (approx. 2cm)

1. 3 Way Shoe to Mary Jane

2. Cut along the line drawn so that you end up with two pieces and discard the top piece.

2. 3 Way Shoe to Mary Jane

3. Take each of the remaining pieces and flip over so that the point is on the bottom. Join these pieces to pattern piece # 2 (toe piece) with a pin as shown.

3. 3 Way Shoe to Mary Jane

4. Once both sides are joined, trace over using Vilene or baking paper so that you have 1 piece without joins. I found that I had to add 1cm on top of the straight edges as shown in photo so that there was enough for a seam allowance.

4. 3 Way Shoe to Mary Jane

5. Cut out material using the above piece (instead of separate 1 & 2), and cut out piece #3 (sole with no alterations)

5. 3 Way Shoe to Mary Jane

6. Stitch the two short ends together (the back of the top piece of the shoe).  Mark the middle on the toe by folding in half and try it on the doll’s foot with the wrong side facing out so that it can be pinned to fit the top of the foot.  Stitch.

6. 3 Way Shoe to Mary Jane

7.  Try it back on the foot to check the fit.  Mine is a little loose as the fabric is a bit too stretchy. I have also marked the top of the shoe where I am going to trim a little of the excess fabric off.

7. 3 Way Shoe to Mary Jane

8. After you are happy with the fit, attach this piece to the sole, right sides together. Stitch with a ¼ inch seam.

. 3 Way Shoe to Mary Jane

9. Trim seam allowance close to the stitching (approx. 1/8 inch), clip curves if needed or trim use pinking shears and turn to right side. Push curves out so they give a nice smooth curve on the outside.

9. 3 Way Shoe to Mary Jane

10. Fit back on the doll and turn down hem around top of the shoe. Pin the hem where you would like it to be – high or low depending on finished look.

10. 3 Way Shoe to Mary Jane

11. Either hand stitch the hem around the top of the shoe (easiest) or sew using a machine.

11. 3 Way Shoe to Mary Jane

12. After the hem has been stitched down, try the shoe back on and cut a piece of 6mm elastic to fit across the instep. Pin in place on both sides after you are happy with the placement. Stitch in place.

13. 3 Way Shoe to Mary Jane

Thanks so much for sharing this with us Tina, you’ve done a great job describing your process and the Mary Janes are adorable on ‘Alice in Wonderland’.

This process can also be used to make a pair of Mary Jane shoes for the Cabbage Patch doll too, just use the 18 1/2″ Cabbage Patch size 3 Ways Shoe Pattern to make your alterations to.

Do let me know if you use these instructions to make your very own pair of Mary Janes from my 3 Way Shoe pattern, I’d love to see a photo.

Mary Jane shoes on Alice in Wonderland

Happy sewing

Rosie

Rosie's Blog |

March 3, 2021

| by Rosie Admin

Share and Tell March 2021

Oh my gosh I’ve been soooo slack!  You guys have been amazing, sewing up a storm and I haven’t posted your wonderful creations in a blog post for months.  So let’s get started.

Wedding Dress Bodice

Narelle has made the most gorgeous wedding dress with lace overlay on the bodice and lace sleeves, then stitched beautiful tiny pearls around the edges of the bodice.  Love it!

‘Hi Rosie, here’s a couple of pics of the bride outfit I have made for my granddaughter’s birthday, for a Journey Girl doll.  Your patterns are very easy to follow and the very clear instructions in your videos are a great help, especially the tips! 

Very happy with the end result! 

Regards, Narelle’

Wedding Dress

Oh my Gosh, Marlene has been soooo busy creating lots of outfits for her granddaughter’s Cabbage Patch doll that I had a really hard time deciding which ones to include in this blog post.  I just love the variety and I’m sure your granddaughter was thrilled to receive this wonderful collection of doll clothes Marlene.  I especially love the bright and fun nappies/diapers.  Well done.

‘I purchased some patterns off you recently. I really enjoyed making them. I thought you might like to see the finished products made out of scraps. They are for my 3 year old granddaughter in Melbourne. Marlene’

Nappy Diaper Pattern

Great to see Peg is enjoying sewing doll clothes and finding my step-by-step videos so helpful.  Your Summer Dress is very pretty Peg and I’m looking forward to seeing what you make next.

‘Here is my first (but definitely not my last) doll dress with your pattern.

Thank you for your great pattern, instructions and Especially your videos for us visual learners. So excited to find your Facebook group as well.

Blessings,

Margaret (Peg)’

Summer Dress Pattern

Julianne has also been super busy creating an amazing wardrobe for her Our Generation doll, Sarah.

‘Hi Rosie, just love your patterns and easy instructions together with wonderful videos if I’m a bit unsure. I have done a lot of cutting out so far ready to make more but have attached photos of Our Generation doll, Sarah, modelling summer dress, Vintage 50’s dress with sleeves and added net underskirt to the design. The evening gown is also the 50’s dress, the skirt of which is a lightweight curtain from a charity shop also with double layer netting underskirt. Also modelling blouse and overalls. Hope you like them. 

Julianne’

Overalls for All Seasons

50's Vintage Dress

50's Vintage Dress Pattern

Summer Dress Pattern

Thanks for letting me know how helpful you have found the videos Julianne.  Sarah looks super impressed with all her beautiful new outfits.  Love the upcycling too.

Wedding Dress Pattern

This last photo shows three beautiful pink princesses that Donna has made using my Wedding Dress pattern.

‘I just finished making these up today, I’m addicted.  Bought 2 more dolls, now these 3 are mine.’

It’s funny how once we start sewing for dolls, we become addicted and accumulating dolls.  You’re not alone Donna.

Thank you all for sending in your wonderful photos and sharing your amazing sewing journey with us.  I have lots more emails and photos to share and am hoping to do another Share and Tell soon.

Until then, stay healthy and happy sewing

Rosie

Rosie's Blog |

October 30, 2020

| by Rosie Admin

Merry Christmas 2020

Wow, what a year we’ve all had!  It certainly has brought its challenges and I’d like to acknowledge those who were diverted from making doll clothes for a time so that you could sew face masks in an effort to keep family and friends safe.  It’s wonderful to know that because you share a love of sewing, you were able to contribute in such a valuable way.

Some very positive things have also come from this year.  I’ve actually had a number of people join me in learning how to sew in an effort to fill in their many hours during lock down.  Not only have they become competent sewers, they have now become addicted to sewing doll clothes – YAY!!!!

RDCP logo santa hat and tree

It has also brought to light some very inspiring people such as Yvonne, who brought joy to her neighbourhood with ‘The Adventures of Vacciney’ which was featured in one of my earlier blog posts.  This is a wonderful story and well worth a read.

Peasant skirt ag cpk

This year saw the release of my Peasant Skirt pattern for 18 Inch and American Girl dolls and the Peasant Skirt pattern for 18 ½ Inch Cabbage Patch Kids.  These patterns have proved to be super popular and I’m not sure if it’s because it comes with a number of variations, because it’s super quick and easy to make, or because it just looks adorable.

I’ve also added some more blog posts with tips on sewing with stretch fabric, using your serger/overlocker, making tiny straps and working with fat quarters.  If you want to refer back to these blog posts, remember you will find links to these and lots of other helpful blog posts on my Free Resources page.

Our fabulous Facebook group has continued to grow and we now have over 1700 awesome members.  It’s such a lovely place to hang out as everyone is so friendly and encouraging.  And talk about inspiration!  I recently spent a good half hour just scrolling through some of the amazing photos that were posted this year.  Thank you to each and every one of you as you have become my special ‘online family’.

It’s at this time of the year that I also like to remind people how my 18 inch and American Girl Funky Fur pattern can be made into a ‘Santa Suit’.  It looks super cool and is a huge hit with the little ones.  Works just as well for the 18 ½ inch Cabbage Patch Kids Funky Fur pattern too.  If you’d like to know more about this, check out my blog post, ‘How to Make a Doll Clothes Santa Suit’.

And finally, I’d like to thank you all for your wonderful support again this year.  Without you, I wouldn’t be here!

Wishing you a fantastic Holiday season and here’s hoping 2021 will be a year full of positivity, friendships and of course lots and lots of doll related sewing.

Merry Christmas

Rosie

American Girl Funky Fur Santa Suit

Rosie's Blog |

October 23, 2020

| by Rosie Admin

Great Tips When Using Your Serger (Overlocker)

Recently I received the following enquiry from Debra and after answering her questions, I realised there may be other people wondering the same thing so I’m sharing this information here and I’ve added some photos so that you can clearly see what I’m talking about. 

‘I’m enrolled in your Learn to Love Your Serger/Overlocker course, but have a couple questions specific to my machine.
1.  I have a White Super Lock model 534. It does not have a way to lower the cutting blade. Should I just remove the blade altogether?
2. There is no differential feed dial. Is there another way to make this adjustment?
Thanks for any help!’

So let’s start with Question one – The Cutting Blade

Lowering the cutting blade is a quick and easy way to sew around tight concave curves without the fear of cutting into the fabric with your cutting blade.  If your machine doesn’t have the ability to easily lower the cutting blade and it is easy to remove and reinstate your blade, then yes by all means do so. However, using the following techniques, may allow you to sew around curves and corners without having to remove the blades.

If you have a tiny concave curve, make some clips inside the seam allowance around the curve.  This will allow you to pull the fabric straight as you are serging and therefore avoid the butting blade. When making your clips, it is important that you do not make these clips too long as you don’t want to go beyond the stitching line.

Clip around the curve

Pull the curve out straight as you serge

Serged Curve

If you are wanting to serge around an ‘inside’ corner you simply make a clip at the very corner so that you can pull the fabric out straight as you serger, avoiding the cutting blade. Again, be careful not to make this clip too long as you don’t want to go beyond the stitching line.

Clip the corner

Pull the fabric straight

a serged corner

Let’s now look at Question two – Serging (Overlocking) Without a Differential Feed Dial

A Differential Feed Dial allows you to adjust the rate that the feed dogs move in relation to the stitches.  It is often used to prevent fabric from being ‘pulled in/gathered’ or ‘stretched’ as you serge and this can happen with certain types of fabric.

If you are wanting to prevent fabric from stretching as you serge and you don’t have a Differential Feed dial, using a water-soluble stabilizer such as ‘Solvi’ will work wonderfully.

I cut the Solvi in thin strips and lay it over the fabric as I stitch.  You then just wash the solvi away when finished.

Place solvi on top of fabric as you serge

You can see the amazing difference this makes when working with a very stretchy fabric.

The top piece has been serged without Solvi and the bottom piece was stitched with a thin strip of Solvi placed on top of the fabric as it was serged.

comparing fabric without and fabric with solvi

Do let me know if this information has been helpful and if you have any other tips that you use when you don’t have a differential feed dial, I love to hear them.

Or if you’d like to learn lots more tips that will have you using your serger (overlocker) with confidence then my Learn to Love Your Serger online course will be perfect for you.

Happy sewing

Rosie

Rosie's Blog |

October 5, 2020

| by Rosie Admin

Share and Tell October 2020

The Sew-Along theme in my Facebook group for August was based on my Wedding Dress pattern and I’m so excited to share these photos because they are absolutely gorgeous and the alterations are amazing!!!!  Warning, this is a very long blog post because I had so much trouble narrowing down the photos.

Cynthia had so many entries in the Sew-Along that I lost count – and every single one was so different.

‘This one is made from my wedding dress and veil from 1975. A lot work taking my dress apart, but I truly enjoy the outcome. I guess you can say I adore this pattern. Thank you, Rosie, for creating it. You got me hooked. But I love it.’

How special is this dress!

The second dress has been made into a cocktail dress by adding lace overlay on the bodice and the back of the skirt. The red and black is stunning.

Cynthia made from her wedding dress 1975

Cynthia half lace overlay on back cocktail dress

Debra removed gathers from skirt

Debra added puff sleeves with wider trim

Next, we have these dresses by Debra. In the first photo you can see that she has removed the gathers from the skirt by taking 1 ¾ inches (approx. 4.5cm) from both side seams which has given the dress a slimline look.

For the second dress, Debra added the puff sleeves from my Blouse pattern and made the cuffs much wider to create a ‘Juliet Sleeve’. Using the contrasting fabric on the skirt and the sleeve cuff has given this dress a totally different look.

You’re so clever Debra, I love them both.

These next two dresses are made using my sleeveless version of the Wedding Dress pattern.

Natalie has used a beautiful bright red satin and added an overlay on the skirt. She decided to not add the petticoat to give a simpler look but stunning look.

Irene has used a soft pink satin and an overlay of white sheer with silver dots of both the bodice and the skirt. The petticoat gives more fullness to the skirt. So pretty in pink.

Natalie - different fabric and overlay

Irene pink with overlay

Monica also had lots of entries in the Sew-Along and has swapped out the veil for some amazing fascinators, hats and headbands. By varying the fabric, the length of the dress, making it with sleeves or without sleeves and adding lace to some, she has created five very different and beautiful dresses. Monica has also resized the pattern to fit all the different dolls. Awesome job Monica!

Monica 5 x brides

These two bridesmaids are soooo pretty.

Jill has used a tiny floral print in soft tones. She has shortened the sleeves on her dress and added lace to the hem of the sleeves and the skirt. Jill reduced the wedding dress pattern to 96% to fit her Journey Girl doll.

Rina has opted for the sleeveless version and added a lace overlay on the bodice, although it is difficult to see in this photo. Then a simple pink ribbon bow to highlight the centre of the flowers is the perfect finishing touch.

Beautiful job Jill and Rina!

Jill short sleeves lace at hems and different fabric

Rina bridesmaid

Pat different fabric

Pat short pleated skirt

Making a ‘trial dress’ is a great idea when making a pattern for the first time and I have to say, Pat, this dress (the one on the left) has turned out perfectly.

‘This is my first try with the wedding dress pattern with a fabric I did not care much for. Now that it is made into this beautiful pattern, I think it worked out very well, and I like it.’

Pat then decided she would like to swap the circle skirt for a pleated skirt and wow, this has completely changed the dress! This looks very smart and was a very clever idea Pat.

The following dresses have been made by Tina who used to sew lots of fancy dance costumes.

For the first dress she used some left over dance fabric and then added shiny crystals to the centre of each flower and I have to say, this is one STUNNING dress! The centre photo is the wedding dress pattern with lace overlay on the bodice, sleeves and skirt – a beautiful bride! Then every bride needs a bridesmaid, so Tina made the sleeveless version in a pretty peach colour, shortened the skirt and added lace overlay on the bodice only.

Three VERY different dresses made from the same pattern. Amazing!

Tina fancy fabric

Tina lace overlay

Tina shortened to bridesmaid dress

Originally Susan was going to make the dress as per the pattern with black lace overlay on the bodice and sleeves too, but when she was about the stitch up the side seam of the bodice, she placed it on her doll with the skirt and decided it was a little too heavy and old fashioned to be the prom dress she was hoping for. Her solution was to alter the bodice and use the lace for little cap sleeves and I have to say WOW! This has transformed this dress into a stunning Prom dress!

And finally, we have this gorgeous black satin evening gown by Wendy. She simply used the sleeveless option and added some tulle across the shoulders at the back, across the front and secured with a button in front. Such a clever idea to add some extra glam!

Susan altered bodice

Wendy evening dress

As you can see there were some truly amazing creations in the August Sew-Along and they were all made from my Wedding Dress pattern. I’m so proud of all the creative ladies in my Facebook group and I hope they have inspired you to get creative and mix up your patterns with different fabrics and slight modifications.

If you would like to try my Wedding Dress pattern you can find the 18” American Girl size here and the 18 ½” Cabbage Patch size pattern is here.

Happy sewing

Rosie

Rosie's Blog |

September 9, 2020

| by Rosie Admin

A Great Tip When Using Fat Quarters to Sew Doll Clothes

One of the best things about sewing doll clothes is that you can make some really cute clothes with a tiny bit of fabric.  The problem arises when we are wanting a long piece to use for a skirt or the skirt of a dress and unfortunately a fat quarter or that perfect piece of fabric you have is just not long enough without joining two pieces together.

The most common thing people do in this situation is to join the fabric in the centre.  The problem is that this means we have a join at the centre front of the dress or skirt and depending on the print on the fabric, it can look quite unsightly.

‘Sew’ how do we avoid this?

Easy!  We simply make two seams instead of one and this way we end up with two side seams. Someone looking from the front, would not know you have joined your fabric.  Let me show you how it’s done.  I’ll be using my Pinafore Dress Skirt pattern.

Ugly centre seam

1. If your skirt pattern piece tells you to place it on the fold, lay it on a single layer of fabric and add ½ ” (12mm) to one end.  This gives you ¼” (6mm) seam allowance for each side seam.  Cut and place to the side.  If you pattern piece is the complete length of your skirt piece, fold it in half and then add your seam allowance as above.

Add seam allowance x 2

2. Now, fold this pattern piece in half. Double your piece of fabric if it is big enough (or do this step twice), lay the pattern on top and add ¼” (6mm) seam allowance to one end.  This will give you what you need for the side seam.

Add seam allowance x 1

3. Sew the short pieces to both ends of the longer piece.

Sew side seams

4. Ta da! You now have a piece long enough for your skirt without a centre front seam.

Complete skirt piece with two side seams

Hope you find this tip helpful and you can now use all those cute fat quarters to make some pretty little dresses for your dolls.

Happy sewing

Rosie

Happy sewing

Rosie

Rosie's Blog |

July 14, 2020

| by Rosie Admin

Share and Tell August 2020

Wow, can you believe that it’s been three months since I did a Share and Tell blog?  There’s just so much going on in my Facebook Sew and Share group  that I sometimes forget that not everyone has Facebook and that I really do need to share your wonderful creations on my blog too.  ‘Sew’ here are some of the wonderful photos that have been sent in over the last couple of months.

The first photo is from Jill, who makes these cute little Yoda Stuffy toys and made his coat using my Witches costume  as the basic pattern and making alterations.  I’m thinking that Yoda looks pretty happy wearing it Jill.  Great job!

‘Hi Rosie – I had another attempt at making a coat for my baby Yoda stuffy. I thought you would be pleased to know that the witches costume formed the basis for a much more successful Yoda coat – Cheers, Jill.’

Yoda Coat Witches Costume

The next cute little models are Baby Born and the 38cm Miniland dolls who are wearing PJ’s made from my Winter Pyjamas pattern with some slight modifications.

Jemma is the owner of Dingleberry Designs and sells these cute Pyjamas, along with lots of other cute goodies.

How sweet is this little ‘rainbow dress’?  I totally love the idea of blending all the colours of the rainbow together to make this cheerful dress. And oh my gosh, this bride is simply stunning and the lace skirt is gorgeous!

‘I have made quite a few things from your patterns for my Granddaughter’s Our Generation doll and she has loved them.  Her little brother, who has just turned four, wanted a doll too (fear of missing out) so I bought him one for his birthday and he wanted a rainbow dress for his doll. 

I have attached a photo to show the rainbow dress I made from the Summer Dress pattern and the Bride’s dress I made from the Wedding Dress pattern but I couldn’t use the circle skirt as it didn’t work with the lace.  I just gathered the skirt.’

summer rainbow dress

Wedding Dress on Our Generation Doll

This little cutie looks like a handmade ‘Cabbage Patch type’ doll and Frances has made one of the options from my Drop Waist Dress 5 Ways pattern  for her.

She looks adorable Frances, thanks for sending me the photo.

Frances drop waist dress

Susan has done a fantastic job of creating this amazing kimono.

‘This kimono for my 18″ Cabbage Patch doll was made from your Summer Dressing Gown pattern by adding 1.25 – 1.5″ bands to the arm openings and hem of the basic garment, then creating an obi-like wrap-a-round belt.’

Susan Kimono from Summer Dressing Gown

Susan cpk dressing gown

Deborah Handkerchief top and Capri pants

Deborah has been enjoying making my Handkerchief Top and Capri Pants patterns and I can see why, they’ve turned out beautifully!

‘Hi Rosie, I’ve made two of your handkerchief top patterns so far and love it!

Thank you for such a great pattern,

Deborah’

I just love receiving emails and photos of your beautiful creations so thank you and please continue to send them in.  Hearing about your sewing journey is often the highlight of my day and I know sharing these stories and photos helps to inspire others which is a wonderful thing in these trying times.

Stay well and safe and until next time, happy sewing

Rosie

Rosie's Blog |

June 2, 2020

| by Rosie Admin

How Making Doll Clothes Brought Joy to a Neighbourhood

Not to blow my own horn, but I often receive wonderful emails from customers who are either thrilled that they have finally learnt how to sew, excited to have rediscovered their love of sewing through making doll clothes, or just so happy that they don’t have to try and understand complicated instructions and diagrams because they can just follow along with my videos. BUT I’ve never received an email quite like this one……

Yvonne has given me permission to share this inspirational email.  Enjoy!

Thank you to Rosie

The Adventures of Vacciney

‘Thank you Rosie for helping me create these outfits for Vacciney…I still have a few more ideas to bring to life!!’

All I can say is WOW! What a wonderful idea Yvonne. You have found a fun way to spend the long period of isolation and brought so much joy to so many.  THANK YOU!

Rosie

Post navigation

« Prev 1 2 3 4 … 25 Next »

View my #1 Secret on How to Make Doll Clothes the easy way and Save a Fortune!!

How to Sew Doll Clothes Course FREE Tutorials

Privacy Assured: Your email address is never shared with anyone.

Testimonial

Laurie

“I thought I knew how to sew but I learned a lot from Rosie’s How to Make Doll Clothes video course. I now do a lot more flat sewing on other patterns and it makes such a difference. Also, her way of doing elastic is fantastic. I use some other patterns for doll clothes, but I always think about how Rosie would put it together and do it her way. Love Rosie and her great support.”

Laurie – California, USA

Rosie’s Blog Recent Posts

  • April 2023 Sew-Along
  • March 2023 Sew-Along
  • February 2023 Sew-Along
  • January 2023 Sew-Along

Blog Post Archive

Payments Rosie accepts….

PayPal Logo

Stripe
Terms and Conditions
Affiliate Program
Privacy Policy
Links

© 2022 Rosie's Doll Clothes Patterns, a unit of Component Enterprises, Inc.