• Home
  • About
  • Contact
  • Login
  • Cart
Rosies Doll Clothes Patterns
  • All Rosie’s Doll Clothes Patterns
    • American Girl Doll Clothes Patterns
    • Cabbage Patch Doll Clothes Patterns
    • Doll Sizing
    • Testimonials
  • How to Make Doll Clothes Course
    • How to Make Doll Clothes Online Sewing Course
    • Who Will Benefit
  • Learn to Love Your Serger Course
  • Tips & Freebies
    • Free Sewing Patterns
    • Rosie’s Big List of Sewing Tips
    • Rosie’s Sew and Share Facebook Group
  • Our Blog
  • Customer Service
    • Contact Us
    • Frequently Asked Questions
    • Payment for Order
    • Delivery of Products
    • Refund Policy
Menu
  • All Rosie’s Doll Clothes Patterns
    • American Girl Doll Clothes Patterns
    • Cabbage Patch Doll Clothes Patterns
    • Doll Sizing
    • Testimonials
  • How to Make Doll Clothes Course
    • How to Make Doll Clothes Online Sewing Course
    • Who Will Benefit
  • Learn to Love Your Serger Course
  • Tips & Freebies
    • Free Sewing Patterns
    • Rosie’s Big List of Sewing Tips
    • Rosie’s Sew and Share Facebook Group
  • Our Blog
  • Customer Service
    • Contact Us
    • Frequently Asked Questions
    • Payment for Order
    • Delivery of Products
    • Refund Policy
  • About Rosie
  • Affiliate Program
    • Affiliate Resources
  • Buy 18 Inch Doll Clothes Patterns
    • American Girl Doll Clothes Patterns
      • American Girl Doll Accessory Patterns
        • American Girl 3 Way Shoe
        • American Girl Underpants
        • Multi Size Doll Diaper and Nappy Pattern
        • American Girl Fairy Wings
        • American Girl Doll Hat Pattern
      • American Girl Doll Beach Patterns
        • American Girl Doll Bikini and Tankini
        • American Girl One Piece Swim Suit
        • American Girl Sarong
        • American Girl Beach Bag
      • American Girl Doll Bedtime Patterns
        • American Girl Summer Nightie
        • American Girl Winter Nightgown
        • American Girl Winter Pajamas
        • American Girl Summer Dressing Gown
      • American Girl Doll Bottoms Patterns
        • American Girl 3 Way Skirt
        • American Girl Capri Pants
        • American Girl Overalls For All Seasons
        • American Girl Peasant Skirt
        • Cabbage Patch Kids Peasant Skirt
        • American Girl Tights
        • American Girl Sports Shorts
      • American Girl Doll Dress Patterns
        • American Girl Drop Waist Dress 5 Ways
        • American Girl Pinafore Dress and Skirt
        • American Girl Strappy Dress
        • American Girl 50s Vintage Dress
        • American Girl Summer Dress
      • American Girl Doll Glitz and Glamour Patterns
        • American Girl Ballerina
        • American Girl Doll Wedding Dress Pattern
      • American Girl Doll Tops Patterns
        • American Girl Blouse
        • American Girl Doll Trendy Transformable Top
        • American Girl Fun and Frilly Top
        • American Girl T-Shirt
        • American Girl Halter Top
        • American Girl Handkerchief Top
        • American Girl Crop Top
      • American Girl Doll Winter Patterns
        • American Girl Funky Fur
        • American Girl Fur Trimmed Jacket
      • American Girl Halloween Outfits Patterns
        • American Girl Witches Costume
        • American Girl Pumpkin and Tights
        • American Girl Fairy Costume
        • American Girl Angel Costume
    • Cabbage Patch Doll Clothes Patterns
      • Cabbage Patch Doll Accessory Patterns
        • Cabbage Patch 3 Way Shoe
        • Cabbage Patch Underpants
        • Multi Size Doll Diaper and Nappy Patterns
        • Cabbage Patch Fairy Wings
        • Cabbage Patch Hat Pattern
      • Cabbage Patch Doll Beach Patterns
        • Cabbage Patch Bikini and Tankini
        • Cabbage Patch One Piece Swim Suit
        • Cabbage Patch Sarong
        • Cabbage Patch Beach Bag
      • Cabbage Patch Doll Bedtime Patterns
        • Cabbage Patch Summer Nightie
        • Cabbage Patch Winter Nightgown
        • Cabbage Patch Winter Pyjamas
        • Cabbage Patch Summer Dressing Gown
      • Cabbage Patch Doll Bottoms Patterns
        • Cabbage Patch 3 Way Skirt
        • Cabbage Patch Capri Pants
        • Cabbage Patch Overalls For All Seasons
        • Cabbage Patch Tights
        • Cabbage Patch Sports Shorts
      • Cabbage Patch Doll Dresses Patterns
        • Cabbage Patch Kids Drop Waist Dress 5 Ways
        • Cabbage Patch Pinafore Dress and Skirt
        • Cabbage Patch Strappy Dress
        • Cabbage Patch 50s Vintage Dress
        • Cabbage Patch Summer Dress
      • Cabbage Patch Doll Glitz and Glamour Patterns
        • Cabbage Patch Ballerina
        • Cabbage Patch Wedding Dress
      • Cabbage Patch Doll Halloween Patterns
        • Cabbage Patch Angel Costume
        • Cabbage Patch Witches Costume
        • Cabbage Patch Pumpkin and Tights
        • Cabbage Patch Fairy Costume
      • Cabbage Patch Doll Shirt & Tops Patterns
        • Cabbage Patch Blouse
        • Cabbage Patch Fun and Frilly Top
        • Cabbage Patch Kids Trendy Transformable Top
        • Cabbage Patch T-Shirt
        • Cabbage Patch Halter Top
        • Cabbage Patch Handkerchief Top
        • Cabbage Patch Crop Top
      • Cabbage Patch Doll Winter Patterns
        • Cabbage Patch Funky Fur
        • Cabbage Patch Fur Trimmed Jacket
    • Mix and Match 5 or More Products and Save 20%
  • Customer Service
    • Contact Us
    • Currency Converter
    • Delivery of Products
    • Frequently Asked Questions
      • How to Access Your How to Make Doll Clothes Course and Bonus Patterns
      • How to Access Your Patterns and Step By Step Videos
      • How to Log In and Change Your Password
    • Payment for Order
    • Refund Policy
  • Doll Sizing
  • How to Make Doll Clothes Online Sewing Course
    • How To Make Doll Clothes Secret One
    • How To Make Doll Clothes Secret Two and Three
    • How To Sew Doll Clothes For Beginners: Sewing Kit
    • Preview Course Video Week Four – Sewing Curved (Convex) Seams
    • Preview Course Video Week One – Lets Get Started
    • Preview Course Video Week Six – Cutting Button Holes
    • Who Will Benefit
  • How to Use a Serger Online Course
  • Links
  • Log Out
  • Login
  • Lost Password
  • Patterns Catalog
  • Privacy Policy
  • Profile
  • r0IPN12
  • Register
  • Reset Password
  • Rosie’s Big List of Sewing Tips
    • Free Sewing Patterns
  • Rosie’s Blog
  • Team Management
  • Tell a Friend
  • Terms and Conditions
  • Testimonials
  • Thank You
  • Welcome
  • Welcome! What are you going to sew today?
  • What you get with Rosie’s Doll Clothes Patterns

Log in to view your videos
and print your patterns

login

Author Archives: Rosie Admin

Rosie's Blog |

September 7, 2013

| by Rosie Admin

Peggy Shows How to Make a Doll Dress from a Knee Sock

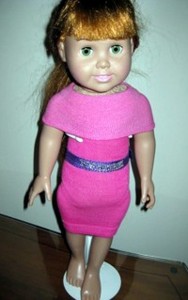
peggy sock dress pink shawl neckline

I’m sure you all know Peggy by now, she is one of my wonderful customers who loves to experiment when making doll clothes and has shared a number of her creations using ladies socks.  Well, today Peggy shows us how to make a dress for your doll using a knee sock.

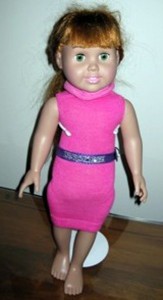
Here is the finished dress with two options. The first has a shawl neckline and the second has a turtle neck neckline – this is the same dress, just worn differently.  Peggy explains how to achieve the different looks at the bottom of her instructions.
peggy sock dress pink turtle neckline

sock dress 1

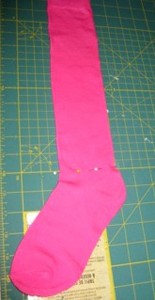
1. I started with a full knee sock and marked it at about 12″ down from the top, just before it turns into the heel.
sock dress 2

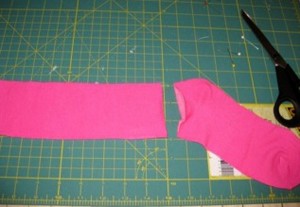
2. I cut the sock across at this point creating a 12″ tube
sock dress 3

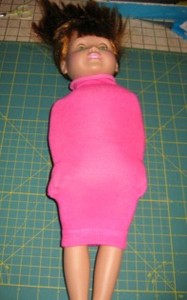
3. Next I pulled the tube onto the doll with the top (finished edge) of the sock located in the spot where I want the bottom of the dress to be. It helps if you try to line up the side fold along the outside of the doll’s arm.
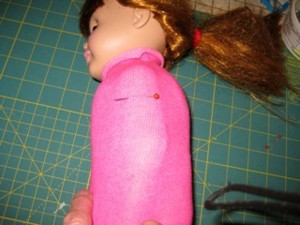
sock dress 4

 4. Then I marked the location of the arm, figuring that where I place my pin is where the bottom of the armhole will be.
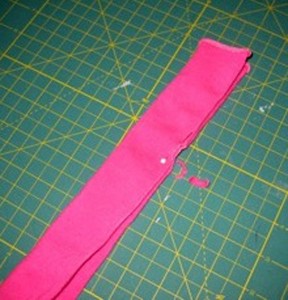
sock dress 5

5. I then took the tube off the doll and folded it in half lengthwise keeping the pin for the armhole in place. Then I cut a snippet out of both pieces together. The hole I made is about 1″ in length and almost 1/4″ in from the outside edge. On my tube I made the bottom edge of the cut about 8″ up from the finished edge of the sock.
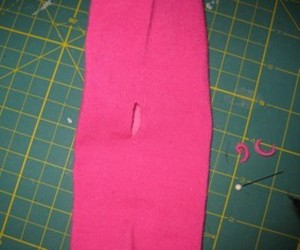
sock dress 6

6. This is what it looks like on both sides with the little holes cut.
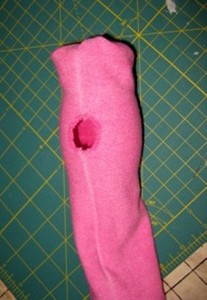
sock dress 7

7. The next step is to turn the tube inside out and slip stitch around the edges of each armhole.

I did my best to fold back a little bit of the raw edge to make it as neat as possible. What helped was to put a small rounded wine glass inside to help hold it open and make it easier to sew. Without it my hands cramped up constantly. Oh the joys of getting old and having arthritis in my hands. Anyway I remember when I was a child my mother used to darn socks with a light bulb inside to help make it easier.

When I did the first sweater/dress I tried to zigzag stitch around the edges of the opening but it stretched out of shape and was really difficult to do.  If anyone has a better plan I would love to hear about it. I thought about trying to make a buttonhole type of opening but couldn’t figure out how to logically do it with my sewing machine in such a confined space. Anyway, the slipstitch technique works fine.

I then turned the dress right side out and put it on the doll with one of the little belts I have here. To create the shawl neckline I just pulled the rolled top down over the shoulders. Since the doll does not move her arms it stays in place fairly well. To do the turtleneck top I just let the cut edge of the sock roll up and create the turtleneck.

Thanks so much Peggy for sharing this with us, I love the tip about the wine glass!   I look forward to your next creation.

In the meantime if you are looking for an easy way to make doll clothes then check out my awesome video course for all the help you ever wanted.


Happy Sewing


By Rosie Saw
8 Comments
Rosie's Blog |

August 24, 2013

| by Rosie Admin

Cabbage Patch Kids Funky Fur Doll Clothes Pattern Release

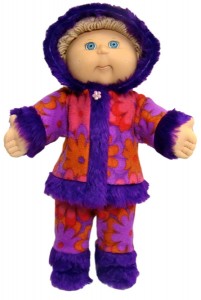
I know it’s still a little warm in the northern hemisphere at the moment but I’ve had many requests for this pattern from my 18 ½ inch Cabbage Patch doll clothes patterns customers and I felt I couldn’t keep you waiting any longer.  Yes,  I’ve finally gotten around to redesigning the hood to fit the wider head of the Cabbage Patch doll so the Funky Fur 18 ½ inch Cabbage Patch doll clothes pattern is FINALLY AVAILABLE!

This is one of the more popular outfits sold on my Rosie’s Dolls Clothes website and has been a huge hit with my 18 inch doll clothes patterns customers.  ‘SEW’ I’m really excited to be releasing this Funky Fur doll clothes pattern today in the larger 18 ½ inch Cabbage Patch doll size because it means that you too can now make this great outfit for your Cabbage Patch doll!  It will certainly keep your doll warm as toast while playing with friends this winter and is ideal for wearing on the ski slopes. For tips on how to turn this pattern into an awesome Santa suit for your doll read my Christmas blog from a couple of years ago.

Cabbage Patch Kids Doll Clothes Patterns Winter Funky Fur

The Funky Fur pattern includes pattern pieces for the fur trimmed hooded top and the fur trimmed long pants.  And remember, when you purchase my downloadable PDF patterns and written instructions, you also receive LIFETIME access to my online video tutorial where I show you step-by-step how to make this great doll clothes pattern.   

This pattern is also available in the Cabbage Patch Winter Bundle offer which makes it even better value.

Happy Sewing


3 Comments
Rosie's Blog |

August 10, 2013

| by Rosie Admin

Rosies Doll Clothes Patterns Share and Tell August 2013

Yes, it’s time for my favorite blog again where everyone gets to share their gorgeous doll clothes that they have been busy sewing.

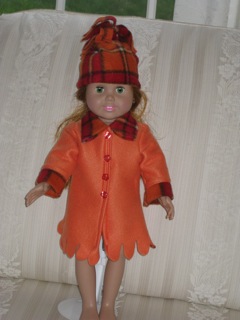
Peggy has been working on my fur trimmed jacket pattern but without the fur.  She has used a piece of plain fleece fabric she had that was scalloped along the edge so used the scallop as a feature on the hem.  She then used a plaid fleece scarf for the collar and cuffs and then made a cap from the fringed end of the scarf.  Peggy suggested, “It looks like she might need a pair of pants or tights to go with this coat.  I’ll work on something real soon.”

This is very clever Peggy, I love the way you experiment and add your own special touches to my doll clothes patterns.

Peggy American Girl Fur Trimmed Jacket Doll Clothes Patterns

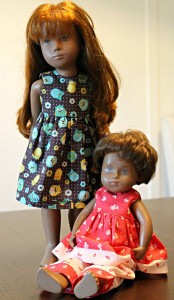
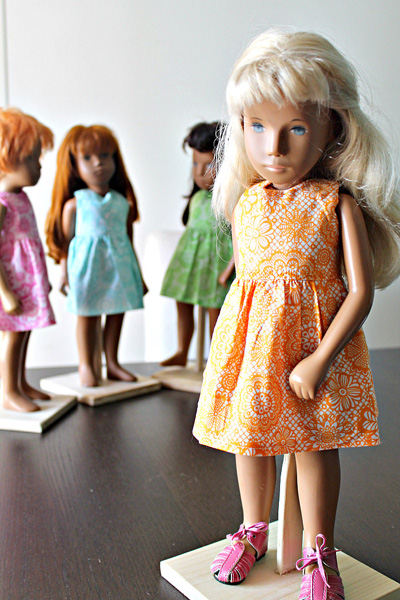
Lauri  Sasha Doll Resized Doll Clothes Pattern Summer Dress

I featured Lauri in my last blog and she has been busy adjusting more of my patterns.

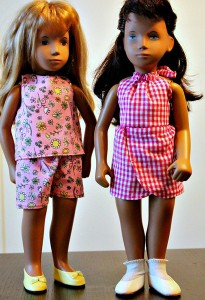
“I wanted to show you some of the other outfits I’ve made from your DVDs & Patterns for my Sasha dolls, shrunk down to between 80-85% depending upon each pattern. After working through the DVD lessons for a few weeks, I started with the crop top & shorts, then moved on to the halter and sarong skirt. Next you can see my first go at the sundress. (My daughter really loves this one with the owls.) Also in the picture shows how I adapted it for the Sasha toddler doll, with some little trousers underneath made from the shorts pattern.”

I must say Lauri, you have done a fantastic job.  I can’t wait to see what you make next.

Lauri Sasha Doll Clothes Patterns Resized Crop Top Sarong Halter Top and Shorts

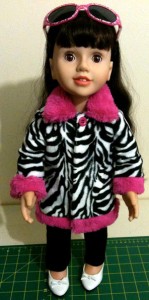
Chris has used my Fur Trimmed Jacket pattern to make her Australian Girl doll, Belle, this stunning jacket.  She looks like a movie star in it and to think that the pink fur is from a cushion cover!

Chris Lucas Fur trimmed Jacket Doll Clothes Patterns

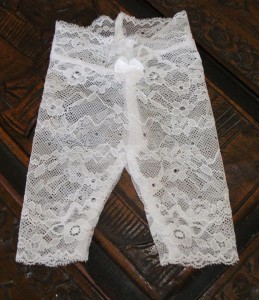
Lynne lace leggins with Tights doll clothes pattern

Lynne has used my tights pattern to make little lace leggings.   She was unable to find stretch lace down here in Australia so bought a pair of large lace undies and unpicked the seams and elastic.  She utilised the scallop edging as the hem and the top to saving turning in, as they were firm enough without the elastic which saved her a little work!!   She used french seams because you can see through the lace and it looks neater that serging.  The little bow on the front is to help the little one distinguish the front from the back.  Lynne found it a lot of work in the unpicking etc, but is happy with them and loves the fact that there is ‘So much scope with basic patterns’

Thanks Lynne for sending in the photo, the lace leggings look really pretty. Sounds like it was quite a challenge working out how to cut them out.  When I use garments that are already made, I cut carefully along close to the seam and this saves me a lot of unpicking (unless of course you need the extra fabric that is in the seam allowance).

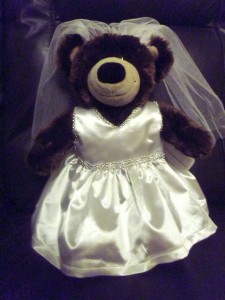
Denise has made this beautiful wedding or Confirmation dress from the summer dress pattern and both her grandkids wanted one!  No wonder they both wanted one, teddy looks absolutely gorgeous!

Denise Teddy in modified summer dress doll clothes pattern

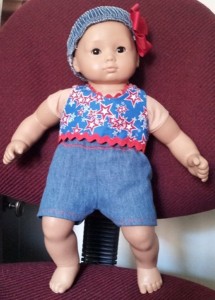
Laurie Bitty Baby American Girl Doll Clothes Pattern shorts and top

Another Laurie has been busy sewing for her Bitty Baby doll.  She wrote, “I have been watching your videos for a few weeks now. I finally made one of your outfits today.

Here is a picture of the Crop Top and Shorts. I used an old pair of jeans for the shorts and some 4th of July fabric for the top. They fit the Bitty Baby, but next time I’ll make the top just a little wider.  I cut the front neck a little lower so I could add the trim.

Very fun!  Even though I have sewn for a long time, your lessons have taught me some great things and reminded me of the importance of measuring and measuring again!

Thank you for what you do.”

My pleasure Laurie, you’ve done a terrific job and it’s great to see that Bitty Baby was able to join in the 4th of July celebrations too.

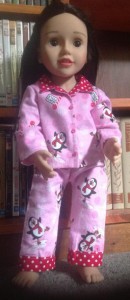
Virginia used my winter pyjamas pattern to make her Australian Girl Doll these adorable PJ’s.  She used a contrasting fabric for the collar and the facing on the top as well as for the cuffs on the legs.  This has turned a plain pair of PJ’s into a real fashion statement, they look absolutely gorgeous

Virginia American Girl Doll Clothes Pattern Winter PJs

Thanks to everyone for sending in these great photos.  It’s awesome to see so many of you experimenting with my doll clothes patterns and putting your own personal touches to them.  Till next time.

Happy Sewing


8 Comments
Rosie's Blog |

July 28, 2013

| by Rosie Admin

Resizing Doll Patterns: Sasha Doll Clothes Patterns

In an earlier blog I explained how easy it is to adjust the size of your doll clothes sewing patterns using a photocopier and it is great to hear that many of you are using this technique to adjust my doll clothes patterns to fit other dolls.

First, Lauri explains how she has adjusted my 18 inch doll clothes patterns to fit her Sasha and Sasha Baby dolls.

‘Hi Rosie,

I thought you might like to see how the dresses turned out for our Sasha dolls. I started with a straight resize of the pattern to about 83% and sewed the first dress. It turned out adorable (and could be perfect just that way – my elder daughter has it on one of her dolls at the moment), but I realized then how easy it could be to lay the pattern down and trace around it just slightly bringing in the armholes, shortening the length, etc. I never “saw” that way before.

I used a longish piece of the extra-soft type of Velcro for the fastening in the back, making it adjustable for different sizes of Sasha dolls. (Sashas are notoriously differing in sizes, depending upon when the doll was manufactured.)

I also had good luck with tweaking the same dress for the Sasha Baby Doll. I don’t recall what % I used, I imagine it was around 75% or so. As with the other, I did a bit of tweaking of the armholes and length. Also, I resized the Summer Shorts from your “How To Make Doll Clothes Video Course” to fit Baby Sasha as kind of a wide-leg trouser. (I shrunk the overall size and lengthened the leg.)  I think it looks adorable under the shortened sundress. (If you notice a pin in the back, it’s because I ran out of Velcro and haven’t gone to the store for more yet.) 

Your way of sewing for dolls makes it so easy to understand – it is definitely the step-by-step videos that make the difference. I am so so so happy I bought your online course and patterns, and will continue to buy more. 

All the Best, Lauri ‘

Sasha doll resizing American Girl Doll Clothes Patter Summer Dress

Sasha Baby doll resizing American Girl Doll Clothes Patter Summer Dress

Sasha Dolls with clothes resized fro American Girl doll clothes patterns

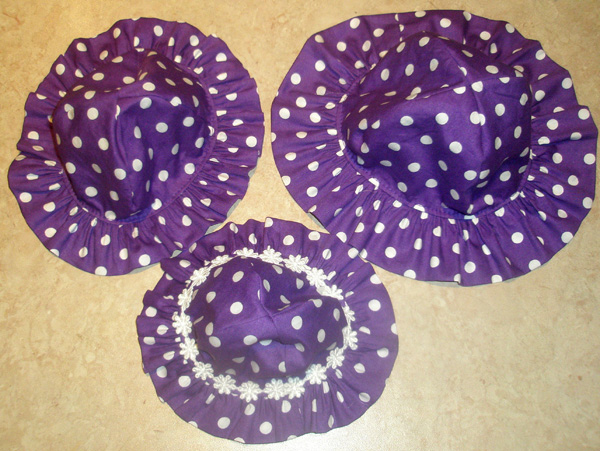
Next, Debbi shows how by using this technique she was able to take my frill hat pattern for 18 inch dolls and make hats of three different sizes.

‘These are just basic hats but I took your tip and reduced them on the photocopier. I included some of the dolls wearing them so you can see they are a good fit.

Regards

Debbi’

Debbi resizing American Girl doll clothes pattern Hat

Debbi resizing hat doll clothes pattern for Australian Girl doll

Debbi three hats resized from american girl doll clothes patterns

Thanks to both Lauri and Debbi for sharing their experiences and photos with us.  I’m sure you have now inspired others to experiment with their own doll clothes patterns.

If you missed my earlier blog, ‘A great tip for resizing doll clothes sewing patterns’ then you will find it listed on my Resources Page .  It certainly is a super tip worth remembering and don’t forget to let me know how you go with your own pattern adjusting.

Happy Sewing


By Rosie Saw
4 Comments
Rosie's Blog |

July 14, 2013

| by Rosie Admin

Do You Wash Your Fabric Before Sewing Doll Clothes?

Recently I received this email from Lauri and thought it may be a question that many people would like answered so I decided to share my response with you all.

‘Hi Rosie, I bought some fabric and “fat quarters” and I wonder if you can tell me how I should prepare the fabric for sewing? Should I machine wash and dry it first?  Handwash and line dry? I thought I’d get started on readying the fabric while I wait for the DVDs to arrive.’

Thankyou

Lauri

I never wash my fabric before sewing with it unless it’s marked and I cannot cut around the mark or I am making clothes for a fabric doll and I’m worried about the fabric color running (in this case I use salted water).  If you must wash it just do it by hand as the fabric should not be a large amount and then line dry.  If you have a large amount, then zigzag the raw edges to prevent fraying and pop it in the washing machine but on a gentle cycle.  If you have a serger you can always run a three thread serge around the raw edges before washing in the machine.

The only other reason for washing it first is if the grain does not look straight i.e. the threads that make up the fabric look like they are going on an angle rather than vertical and horizontal but this is usually only with very cheap fabric.  In this case wash it by hand and pull to shape while still wet.

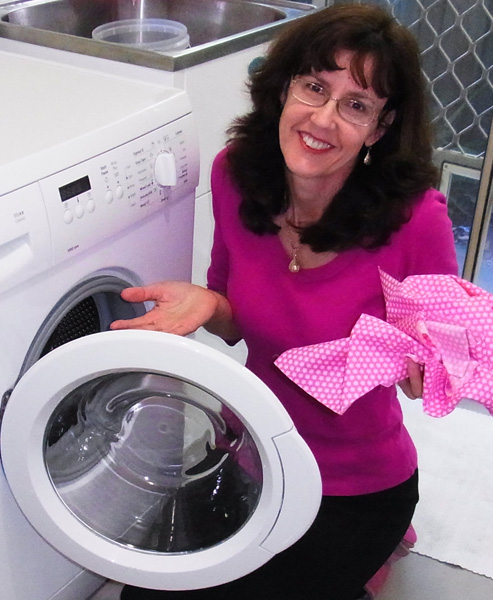
Rosie Washing Fabric before Sewing Doll Clothes

The most important thing to do in preparation is to make sure that there are no major creases in it because when you are cutting your pattern you need the fabric to be flat otherwise the pattern piece may be a little distorted.  If the fabric is very crushed, I spray it with water and then iron as I find this works better than just using the steam function on my iron.

Remember, you are sewing doll clothes and the pieces are only small so if the grain is off a little, it won’t have a great effect on the finished product.  We also don’t tend to wash doll clothes very often so you really don’t have to worry about shrinkage and they always look much crisper when the fabric has not been washed.

The traditionalist will always say to wash the fabric first but my Mom has sewn all her life and I don’t think I have ever seen her wash her fabric before sewing and her clothes have always looked great and lasted years (and this is for normal human clothes).   So I have never really seen the need to wash the fabric first, just make sure it has no creases.

Happy Sewing


By Rosie Saw
18 Comments
Rosie's Blog |

June 29, 2013

| by Rosie Admin

Rosie’s Videos Can Now be Viewed on all Apple Devices

Wow, who would have thought that making a video could be so complicated!

When I first started my website we made our video in what is called ‘Flash’ format because it was the format that was popular at the time and it worked just fine.  Then Apple introduced their IPad and IPhone and ‘Flash’ could not play on these electronic devices without using a specially designed App which meant many people who found my website could not view my videos unless they had this special App or …..bla, bla, bla.

Rosanne at cutting table with IPAD

Rosanne at sewing machine with IPAD

Anyway, to cut a long story short, my husband has been very busy converting all my videos over to a format that can be viewed on almost all browsers and operating systems without the need for a special App which means that whether you are using a tablet, smart phone, IPad, IPhone, IPod or your desktop computer you will be able to view and enjoy all my videos instantly. 

So I would like to dedicate this blog to my wonderful husband and to publicly thank him for the many hours he has spent on the weekend and at night after work converting and reloading the hundreds of videos onto my website.  Thank you Brad, I love you.

Now, I would like to ask you all a favor.  Please let me know if you find something not working as you think it should because, although we (he) has done heaps of testing there is always the possibility that something has been missed.  Thanks heaps.

Now back to what I love best….sewing!

Happy Sewing


Brad having his brow wiped

23 Comments
Rosie's Blog |

June 15, 2013

| by Rosie Admin

Rosies Doll Clothes Patterns Share and Tell April and May 2013

As usual, I am running late with my monthly ‘share & tell’ so please forgive me as I combine April and May together.

Firstly, Melanie has been using my patterns and making some clothes for her daughter Tahlia’s Cabbage Patch Kid.  Because this doll is 22” tall she simply enlarges my patterns on the photocopier (see my blog on resizing doll clothes patterns).  Melanie finds my ‘patterns and instructions were so easy to follow,,.but using denim for the dress was quite challenging, as the cotton kept breaking when doing the gathering.  I used upholstery thread instead for this part and it did the trick.’

Thanks for this tip Melanie.  I find the best way to prevent the thread from breaking when gathering thicker fabrics like denim is to loosen the thread tension on my sewing machine, I go down as low as between 0-1. This allows the thread to be pulled to gather the fabric much easier so you may like to give this a try next time.

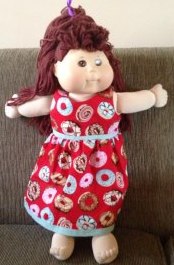
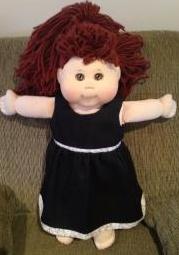
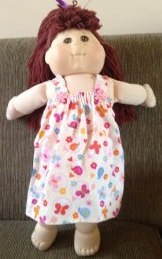
Looks like Tahlia’s Cabbage Patch Kid doll is all set for summer with these cute summer dresses and summer nightie.

summer doll clothes dress

summer doll clothes dress

summer doll clothes dress

summer doll clothes dress

summer doll clothes dress denim

summer nightie doll clothes

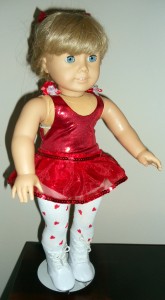
Bathers used for doll clothes skating outfit

When Ruth is not looking after her 1 year old grandson, she loves to make doll clothes for her granddaughter.  Here she has made a lovely skating outfit using my one piece swimsuit pattern and some Lame for the skating skirt.  Ruth says, ‘I’m sure another knit would be better (for the skirt), but not as pretty’ and she also feels that there should be an opening at the back of the swimsuit to make it easier to dress the doll.

I find Velcro tends to pull the Lycra/Spandex thread really easily so prefer not to have the back opening but if you find it necessary to have the opening, this would be easy enough to do.  Firstly, fold the back pattern piece in half and add a ½ inch seam allowance along the straight edge, cut two pieces of fabric.  Sew part way up from the crotch and then join the front and back pieces together at both shoulder seams. Then add the elastic by starting and finishing at the back neckline, attach the elastic at each armhole and then stitch the crotch seam.  Lastly, attach the Velcro strip in the back opening.

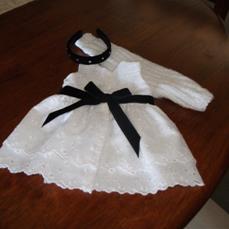
Lynne is an Aussie grandmother who enjoys making doll clothes for her granddaughter living in the US.  She is ‘finding a lot of pieces of fabric from the “olden days” in the cupboard’ and has made this gorgeous little layered ‘party’ dress using my summer dress pattern and some broderie anglaise she has had since her girls were little.  Lynne also embellished it with velvet ribbon, sparkling button and a bow at the back.  To finish the outfit, Lynne made a headband and shrug for the ‘cooler days’.  She has also made some lovely summer capri pant and halter top sets….

 ‘American Girl is accumulating quite a fashionable wardrobe, perhaps I need my own “Girl”.’

American Girl capri pants and crop top doll clothes

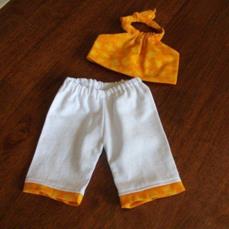
American Girl doll clothes capri pants and halter top yellow

American Girl Summer doll clothes dress made from broderie anglaise

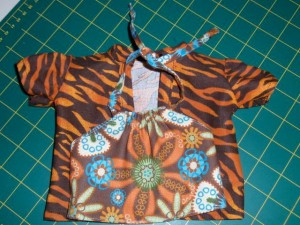
Chris is a fellow Aussie who has just ordered herself an Australian Girl doll and has been busy sewing a new wardrobe for her while waiting for Belle to arrive. When making the halter top, Chris aligned the big flower so it sits in the middle and did the same with the other side but with a big light coloured flower which will make it great as a reversible top.  She also made a little over-shirt in case Belle gets a little chilly LOL.

 Australian Girl halter top and over shirt doll clothes

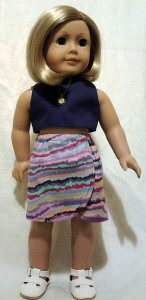
sarong crop top doll clothes

My last ‘share & tell’ is from Katy who I have featured before.  Here you can see Kit’s latest ensemble – ‘I think she looks great in her sarong and crop top. All we need now is the summer weather to go with it…’

Katy has been enjoying working through my How to Make Doll Clothes course and making the bonus patterns and has now gained the confidence to branch out and start working with other patterns and says,

‘I don’t think I could have managed these projects if I hadn’t worked through your course – it really sharpened up my skills.  Thank you for making it available and I look forward to working with more of your patterns.’

To see Katy doll clothes creations and read about her experiences visit her new blog, ‘Kit’s Couture’

Thanks again everyone for sending in your photos and sharing your experiences sewing doll clothes.

Happy Sewing


11 Comments
Rosie's Blog |

June 2, 2013

| by Rosie Admin

Rosie Takes the Mystery Out of Pleating for Doll Clothes

After releasing my 3 Way Skirt Doll Clothes Pattern for 18 Inch American Girl and Cabbage Patch a little while ago, I’ve received a number of emails asking me about the different types of pleats.  The two main types of pleats used when making doll clothes are the ‘knife’ and ‘box’ pleats.  There are variances of these two – casual knife pleat, deep knife pleat, inverted box pleat, etc –  but if you understand how to make these two simple pleats, then you will have no problems working with and creating pleats in your doll clothes. As you all know, I love to ‘show’ you how to do something, rather than write lengthy explanations and drawing umpteen diagrams, so I have put together a video showing you how to create these simple pleats and take the mystery out of pleating.  Enjoy!

For lots more tips and tricks that make sewing doll clothes so much more fun try my How to Make Doll Clothes video course today.

Happy Sewing


By Rosie Saw
12 Comments
Rosie's Blog |

May 17, 2013

| by Rosie Admin

Bundle Offers Now Available at Rosies Doll Clothes Patterns

One of my favorite tv shows at the moment is ‘American Pickers’ and I notice that Frank loves to Bundle the items he purchases, in fact he calls himself the ‘Bundle King’.  I hadn’t really heard this term before I started watching this program and now I have notice that it seems everyone loves to bundle.

Sew I thought it would be great if I could bundle my doll clothes patterns so that when my customers purchase all patterns within the same category at the same time they would get a special ‘bundle’ price.  This means, if you purchase all the 18 inch beach patterns e.g. one piece swim suit, halter top and sarong in the same transaction you will receive 10% off the total retail price.  Yes, simply purchase these three patterns in the one transaction and the shopping cart will reduce the price by 10% – you have to agree, this is an awesome deal!

Rosies Doll Clothes Patterns Bundle Offer


This special ‘Bundle Offer’ is available in each of the doll clothes patterns categories i.e.  Accessories, Beach, Bedtime, Halloween, Summer Fashion and Winter Fashion for both the 18 inch doll clothes patterns and the 18 ½ inch Cabbage Patch doll clothes patterns, sew what are you waiting for?  Grab a ‘Bundle’ and start sewing your doll’s new wardrobe today.

Happy Sewing


Comment
Rosie's Blog |

May 4, 2013

| by Rosie Admin

3 Way Skirt Doll Clothes Pattern for Your 18 ½ inch Cabbage Patch Doll

I’ve had many emails from my wonderful customers who love my 18 ½ inch Cabbage Patch doll clothes patterns wondering when the 3 Way Skirt pattern will be released in the bigger size.  Well, I’m very happy to say you don’t need to wait any longer as it has now been released and is available for sale.

As the name suggests, this awesome pattern is ‘3 patterns in 1’.   Yes, you get the pattern pieces, written instructions and detailed video tutorials to make three different skirts.  And with a little tweaking of your own, it’s possible to create many more styles!

Firstly, the Basic Skirt is a great beginner project and by just altering the length of the skirt or adding trims, you can create many different looks, and it uses such a tiny amount of fabric.

Next, the Frill Skirt is so sweet and again by just altering the length of the frill, you can make a lovely peasant skirt.  Or repeat the instructions for adding the first frill and you can make a multi-layered gypsy skirt – just remember to add extra length to each additional layer.

And finally, the Pleated Skirt is perfect as a Cheer Leading skirt or Basket Ball skirt.  It looks super cute when you use a ‘pretty’ print and made with a plaid fabric, it looks really smart.

Cabbage Patch Kid Doll Clothes Patterns 3 Way Skirt

All skirts are super easy to make and the variations are endless so I know you will have lots of fun sewing this wonderful 3 Way Skirt Doll Clothes Pattern for your 18 ½ inch Cabbage Patch doll.

Happy Sewing


2 Comments

Post navigation

« Prev 1 … 15 16 17 18 19 … 25 Next »

View my #1 Secret on How to Make Doll Clothes the easy way and Save a Fortune!!

How to Sew Doll Clothes Course FREE Tutorials

Privacy Assured: Your email address is never shared with anyone.

Testimonial

Laurie

“I thought I knew how to sew but I learned a lot from Rosie’s How to Make Doll Clothes video course. I now do a lot more flat sewing on other patterns and it makes such a difference. Also, her way of doing elastic is fantastic. I use some other patterns for doll clothes, but I always think about how Rosie would put it together and do it her way. Love Rosie and her great support.”

Laurie – California, USA

Rosie’s Blog Recent Posts

  • April 2023 Sew-Along
  • March 2023 Sew-Along
  • February 2023 Sew-Along
  • January 2023 Sew-Along

Blog Post Archive

Payments Rosie accepts….

PayPal Logo

Stripe
Terms and Conditions
Affiliate Program
Privacy Policy
Links

© 2022 Rosie's Doll Clothes Patterns, a unit of Component Enterprises, Inc.