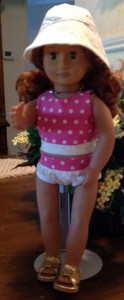
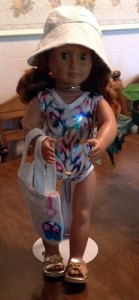
This blog is not only about sharing photos of your doll clothes creations and the successes you have but also about sharing the times when you experience difficulties and how you overcame them. So I’m going to start this time with some photos that Betty Ann sent in and explain the issue that she was having.
Betty Ann was having a hard time with sewing in the elastic on the one piece swim suit the way that I show in my video and so she decided to use fold over elastic instead and managed this a lot easier. She sewed one side of the elastic in place and then turned the fabric and elastic over and sewed the other side.
You too may find this an easier option, just remember that if you are going to substitute fold over elastic in this or any pattern, you must reduce the pattern by ¼ inch (6mm) at the part where you attach the elastic because you are no longer folding the fabric over.
I then suggested that she try stretching the elastic a little as she’s attaching it around the neckline (I understand this is not so easy) but it will help the elastic to lay flat on the doll’s chest. If using good quality Lycra/spandex, you may also like to try sewing around the neckline folding in 1/4″ without the elastic the same way that the armholes are done. The elastic is really just to pull the neckline in a little so that it lays flat on the doll’s chest and if using good quality fabric, elastic is often not needed. I feel you still need elastic around the legs though.
Thanks Rosie, I appreciate the extra help and suggestions they really helped a lot……..on my way to try one more time to make the bathing suit. I love the bathing suit pattern. I’m going to use spandex. Betty Ann
Thanks for sending in your photos and sharing your journey Betty Ann, it’s always lovely to hear from you. Your bikini version is very cute, I’m loving the pink and white spot.
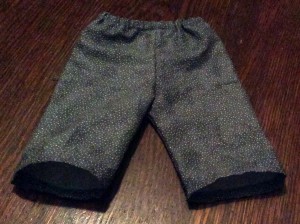
Nellie was having trouble with her serger and the first thing she sewed when she got it working properly was this pair of pants and she said she can’t wait to get sewing with my other patterns. Well done Nellie and I’m so glad you finally got your serger working correctly as they are wonderful for sewing doll clothes.
Hi Rosie
This is really a huge step forward for me! I have difficulty in my finishing touches…I think I rush it too much. Anyway I got out my old over locker (spent 8 hours threading and rethreading and working out all the tensions!!!) but well worth it.
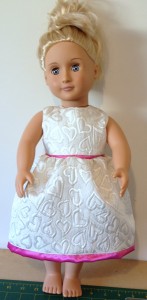
Here is a photo of a beautiful evening gown that I adapted from your summer dress.
I really do need to say a huge thank you for giving me the confidence to get back into sewing but especially for my young granddaughters and their Journey Girl dolls!
Mary-Jane
I’m thrilled that Mary-Jane has regained her confidence with the sewing machine and I’m sure her granddaughter and her Journey Girl dolls are too!
Here are some outfits that Sharon Henry has made from my patterns and because she enjoys her embroidery sewing machine and my pinafore dress pattern so much, Sharon tells me that she is ‘going to make this pattern a hundred different ways using all kinds of embroidery, etc. techniques.’
I can’t wait to see some of her other versions!
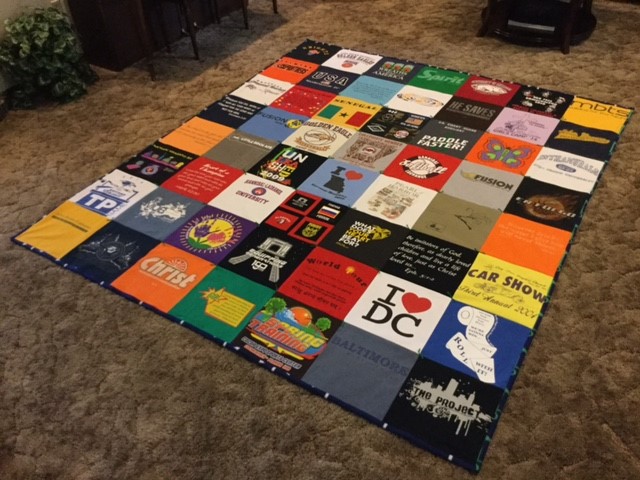
And finally, I just had to share this t-shirt quilt that Teri has made for her son and daughter-in -love (I love this expression). Now I know this has nothing to do with doll clothes and being a quilt for a King size bed, it certainly doesn’t fit into the tiny and fiddly category, but it is such as awesome idea and I think Teri has done such a great job that I just had to include the following story.
It is comprised of the many favorite t-shirts collected by my son and daughter-in-love during their high school and college years. They simply don’t have the storage space for these, but they are too sentimental to throw them out. So…I offered to *attempt* making a t-shirt quilt with them. The selection grew to the 56 shirts you see in the finished quilt. Due to the sheer size, I quickly decided to skip the sashing and border ideas, opting to make a simple 5/8″ border from the backing fabric. Each square is 12″x12″ with a 1/4″ seam. I had to piece the backing together as it was not wide enough off the bolt. That was an education as I learned how to match the repeated pattern. It took me a whole day’s work to achieve ultimate success with the process…many thanks to YouTube video tutorials! It was truly a labor of love! I never would have considered such a project if not for the confidence you have given me with my doll clothes sewing.
Thank you again to everyone who sent in your photos and shared your stories. Now back to the sewing machine to get all those doll clothes finished in time for Santa!
Happy sewing
![]()


Back in 1986 I made the first t-shirt quilt as a member of the Charlotte NC Quilters Guild. I wrote a pamphlet on the process. Each square was backed with iron on interfacing to offset the knit stretch. The finished size was for a queen size bed. The center square featured the Boston Marathon. This quilt was featured in the Charlotte Observer Newspaper.
That’s awesome Martha! Do you have a photo that you can share? Happy sewing, Rosie 🙂
Hi Rosie, I’m with Sharon Henry on the embroidery machine. I love mine and it gives you so many variations to try out. Small designs are perfect for the doll clothes. Teri’s quilt is gorgeous and I think we all understand what she means about being able to try bigger projects after getting confidence with the basics that you so beautifully teach. Thank you for the blog and all the ideas. Happy sewing to everybody.
Yes Cherrylmaree my Mum has an embroidery machine and she keeps trying to get me to buy one but I’m afraid that I wouldn’t have time for anything else if I got one 😛 Thanks for the lovely comments and happy sewing to you too 🙂
Could we have some patterns for 13″ dolls,, please.
Hi Alexandra, You may find my blog, ‘A Great Tip for Resizing Doll Clothes Patterns‘ helpful. You will find this and other blogs that may be helpful for you on my Free Resources Page
Let me know how you get on.
Happy sewing
Rosie 🙂