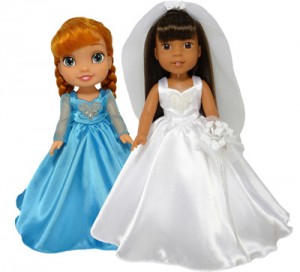
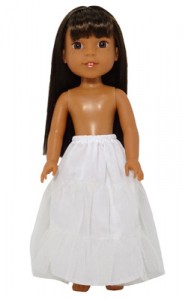
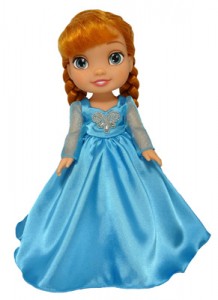
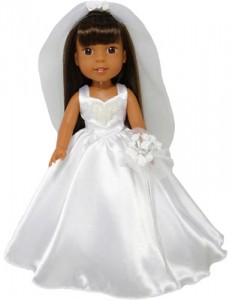
Welcome to Part 4 of my blog series where I’m showing just how easy it is to resize my 18 inch and American Girl doll clothes patterns to fit the smaller 13 inch Disney Toddler and 14 ½ inch Wellie Wishers dolls. As this is my final blog of this series, I’m finishing with one of my most popular patterns, the gorgeous Wedding Dress Pattern. I made the Disney Toddler doll dress in blue with long sleeves to show that this pattern can also be used to create a glamorous ballgown. The Wellie Wishers doll is wearing the wedding dress option without sleeves. All patterns were printed by reducing my 18 inch and American Girl doll clothes patterns and the following table shows you what percentage to reduce them by as well as additional adjustments that were made.
If you missed part 3 of the blog where we looked at resizing my doll clothes patterns with a focus on summer outfits, be sure to check it out.
DISNEY TODDLER DOLL
WELLIE WISHERS DOLL
Cut a piece of cotton or polycotton 16” x 8 ½” (40cm x 22cm)
Cut one piece of Netting 32” x 2 ½” (80cm x 6cm)
Cut one piece of Netting 24” x 5” (60cm x 12cm)
¼” Elastic x 6” (6mm Elastic x 15cm)
Attach the narrow piece of netting 2 ½” (6cm) up from the finished hem.
Attach the wider piece of netting 5” (12cm) up from the finished hem.
Cut a piece of cotton or polycotton 16” x 9” (40cm x 23cm)
Netting – same as for Disney Toddler
Elastic – same as for Disney Toddler
Attach as per Disney Toddler.
DISNEY TODDLER DOLL
WELLIE WISHERS DOLL
Print bodice at 60%
Print Long Sleeve at 65% and to the Australian Girl cutting line, add 1/8” (3mm) to the width on both sides i.e. to the seam allowance. Shorten the sleeve ¼” (6mm).
Print Skirt at 65% and add ¾” to the length of the Australian Girl cutting line.
Print Bodice at 65% and add ¼” to the length of the bodice.
If making the option with long sleeves, print Long Sleeve at 65% and to the Australian Girl cutting line, add 1/8” (3mm) to the width on both sides i.e. to the seam allowance.
Print Skirt at 65% and add 1 ¼” to the length of the Australian Girl cutting line.
For the veil, I simply cut 4 pieces of tulle/netting 12” x 10” (30cm x 25cm), place them on top of each other and gathered the shorter end then attached to a small comb with a hot glue gun and added small flowers.
I made this the same way as the original, larger one but used smaller flowers and a smaller piece of tulle.
Hope you have enjoyed this series of blogs and I’d love you to share photos of the dresses you make. If you missed the earlier blogs, you will find them by clicking the following links: Part 1, Part 2, Part 3.
If you need help resizing your patterns with your printer, you may be interested in my blog, How to Resize You PDF Doll Clothes Pattern Using Your Printer.
If you have other sized dolls and would like to know how to determine how much to reduce or increase your pattern, you may be interested in my blog, A Great Tip for Resizing Doll Clothes Sewing Patterns.
Happy reducing & sewing


Hi Rosie, These posts have been very helpful thank you. Just letting you know that Kayla is 21 now and will be putting her sewing skills to the test for her own little girl from sometime in November. She’s very excited and I can see that all of our patterns will be getting a workout. Best wishes from us both.
Oh, how exciting! This is wonderful news Cherrylmaree. Please pass on my best wishes to Kayla and if you think of it, I’d love you to email me a photo of Kayla and her bub, after all, you guys feel like family to me now 🙂
Thank you Rosie! Your always so kind too share ideas with us.
My pleasure Lawana. Don’t forget to send me photos of doll clothes you make using these tips 🙂
I have the Dianna Effner Little Darling dolls and they are 13-1/2 inch dolls as well, I have been doing the same adjustments on resizing the 18 inch doll patterns by 65 % to fit them as well…you might want to mention that to your readers, this doll is very popular too…
Hi Susan, thanks so much for that information. I will go back and amend my blogs of this series to include this information. Thanks again and Happy sewing, Rosie 🙂
Rosie, I am new to your site and I have to commend you on all the effort you put into both your patterns and your fabulous videos. Thank you so much for your generosity!
My pleasure Valerie. Thank you for letting me know you are enjoying my patterns and the step-by-step videos. I’d love to see photos of the doll clothes you make.
Happy sewing
Rosie 🙂