Some time ago I wrote a blog on Resizing your doll clothes patterns using a photo copier. Since then, I have had a number of people concerned that they don’t have access to a photo copier so I thought I should do an update on that blog.
You don’t need a photo copier anymore, you can use your printer and adjust your printer properties i.e. enlarge or shrink your pattern by a specified percentage. This works fantastically with a PDF pattern saved to your computer.
You will need a version of Adobe Reader 10 or later. If you have Adobe 9 or earlier, you can only adjust the pattern by a preset scale of options so I suggest you download the latest version (it’s free) from the Adobe.com website.
As my husband has been home on holidays, I thought I would take advantage of his computer skills and convinced him that a video showing how to use this resizing function would be much better and easier for people to understand than me typing out a long list of complicated instructions. After all, we all know that it’s much easier to understand something when we are shown. So Brad has put together the following video which shows how to use Adobe Reader version 10 and Version 11. Obviously there are updates all the time so if your version of Adobe is different to what we show in the video and you are unable to work out how to use it, please check the Adobe website for instructions.
Don’t forget to scroll down after the video has finished as I show you the results of printing at 50% original size and also 150%. Take it away Brad…….
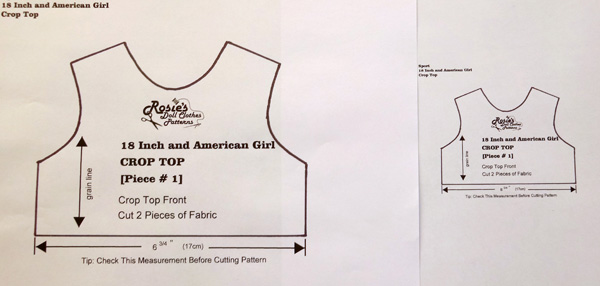
In the picture below you can see the 18 inch and American Girl Crop Top Front pattern piece on the left is the pattern printed to the original size and on the right is the pattern piece printed at 50%. You can check this has worked correctly by measuring along the bottom edge of the pattern – the smaller pattern should measure 8.5cm which is half the original 17cm.


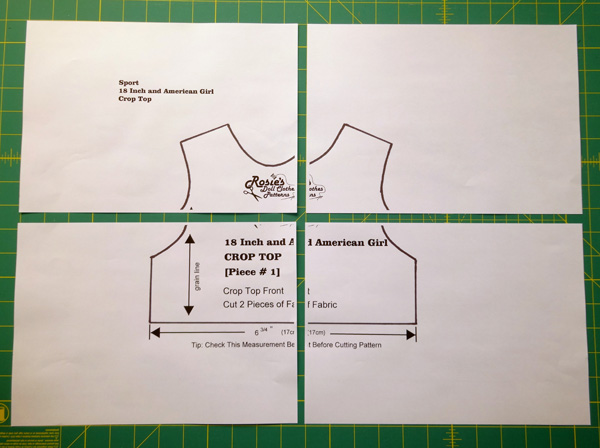
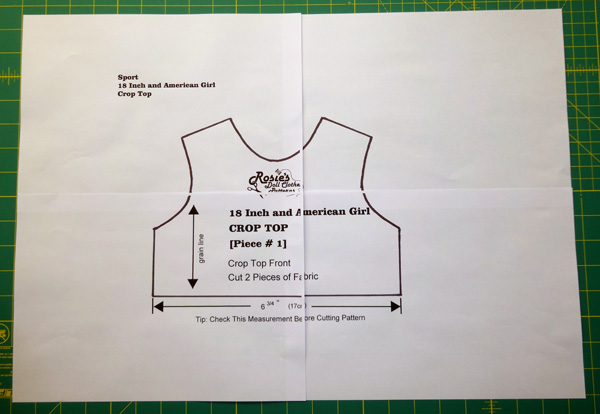
The following photos show the same crop top pattern printed at 150%. You can see that it has printed on 4 sheets of paper and I specified ½” (12mm) overlap. On the left are the 4 separate sheets and on the right is the pattern when all the sheets have been glued together. Again, you can check the measurement along the bottom and it should now be 25.5cm.

You’ve got to love technology as resizing your doll clothes pdf patterns has just gotten easier. Any of my 18 Inch American Girl and Cabbage Patch Doll Clothes patterns can be resized.
Because there are so many different size dolls out there, I’m sure you will have to resize one of your doll clothes patterns at some stage and I hope this technique helps to make the resizing of your pattern a much easier and less frustrating thing to do.
Happy Sewing
![]()


Thank you Rosie and Brad,
That gives us all so many more options.
Happy sewing.
Thank you! I did not read the fine print on a simplicity pattern which was for 14″ dolls and I need a pattern for 18″ dolls for my granddaughters. This tutorial gives me hope!! Simplicity Patterns was of no help whatsoever.
Thank you so much Rosie, and Brad! What a wonderful husband Brad is and a great teacher. I have nearly worn our printer in the home office out, and let’s not talk about ink and paper. You have done what we all needed, given us so many more options to make it Happy Sewing.
It’s our pleasure ladies 🙂
Thank you Rosie and Brad! I’m new to doll clothes making and this video is a huge help!
That’s wonderful to hear Connie.
I would like to sew clothes for a 27″ doll that I bought at CVS. Do you have any suggestions for enlarging 18″ doll patterns? Thank you.
Hi Marily, thanks for your enquiry. You may find my blog, ‘A Great Tip for Resizing Doll Clothes Sewing Patterns’ helpful. You may need to use the tile feature on your printer if the pattern pieces become too big to print on one piece of paper. I’d love to hear how you go.
Happy sewing
Rosie 🙂
Rosie, how much do you need to downsize to bitty baby/ bitty twin sizes?
Hi Bev, I think you will find that you don’t need to resize my patterns to fit your bitty baby dolls. I know a lady who just shortened the length of the pants on the winter pyjamas by about 1 1/2″ and they fit perfectly. So you may find that you just simply have to adjust the length of skirts, long pants and maybe the bodice of dresses just a little. Compare your Bitty Baby waist and torso measurement to those of the AG doll and this will give you a better idea. You can find the AG doll measurements on my Doll Sizing page. Let us know how you get on.
Happy sewing
Rosie 🙂
I have a doll shirt pattern and I wanted to enlarge to make it a baggy shirt. My question is would you do a 20% enlargement? Thanks
If you did an increase of the whole pattern, it would enlarge everywhere. If you wanted to make the doll look like she was wearing an older sister’s shirt or something that would work fine. 20% is a lot, though. You might want to start with a smaller percentage. I would definitely recommend that you join the Rosie’s Doll Clothes Patterns Sew & Share group on Facebook (if you’re not already a member) and ask this question there. A lot of the sewists on the group are great at resizing and could give very specific advice. Thanks for asking!